
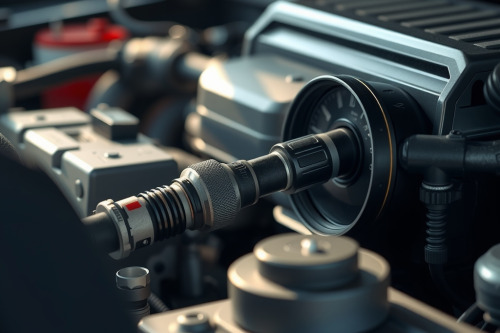
A persistent check engine light linked to a secondary air injection system malfunction leaves raw hydrocarbons unburned during cold starts. In our shop, we routinely trace this fault to dead pumps, gummed valves, or blown fuses before beginners waste money replacing catalytic converters. You need a structured diagnostic routine rather than throwing random replacement parts at your vehicle. Follow these practical shop checks to isolate mechanical and electrical root causes right away.
What triggers a secondary air injection system malfunction
The powertrain control module runs a functional test on cold starts when engine coolant sits below 50°C. Fresh air is pumped directly into the exhaust ports to speed up catalyst light-off. Downstream oxygen sensors monitor this event by tracking voltage drops below 0.2V. If the upstream or downstream sensor fails to register a lean shift within 20 seconds, the computer flags a secondary air injection system malfunction.
Mechanical failure often stems from moisture build-up inside the pump housing. Exhaust gases carry water vapor that leaks backward past worn check valves. During sub-zero weather, this condensation freezes solid and jams the plastic impellers. When the driver starts the car, the seized electric motor draws over 40A and instantly burns out the air pump relay or the main fuse.
Common symptoms accompanying code P0410 on cold starts
Most drivers notice zero handling issues once the engine reaches normal operating temperature of 90°C. The primary warning sign is the illuminated malfunction indicator lamp on your dashboard. However, subtle audio cues exist if you pay close attention during the first 60 seconds of engine run time.
A healthy smog pump sounds similar to a quiet household vacuum cleaner running under the front fender. If you hear a harsh screeching noise, the pump bearings have seized due to corrosion. Total silence during a cold start indicates complete electrical failure. Secondary check valve failure also causes exhaust gases to push backward into the air hoses, producing a distinct ticking or popping exhaust leak sound under moderate acceleration.
Essential diagnostic tools to troubleshoot code P0410
Do not buy replacement parts before gathering baseline electrical and vacuum data. You can resolve this issue in your driveway with basic shop equipment. We suggest preparing a digital multimeter, a handheld vacuum pump with a built-in gauge, a 12V fused jumper wire, and an OBD2 scan tool capable of reading live sensor data.
Bi-directional scan tools save massive amounts of time on modern vehicles. These units let you manually command the pump relay on without waiting 8 hours for an engine cold soak. If your scanner lacks active testing features, a standard voltmeter and jumper wire provide an equally definitive diagnosis across all circuits.
Step-by-step secondary air injection system malfunction testing
Systematic isolation prevents unnecessary component replacement. Work backwards from the electrical delivery circuit to the mechanical valves to identify the damaged link.
Verifying the electric air pump and relay circuit
Locate the primary high-amperage fuse inside the under-hood power distribution box. Most secondary air systems rely on a 30A or 50A maxi-fuse. If the fuse is open, test the motor directly before installing a replacement. Disconnect the electrical harness connector at the pump terminals. Apply direct battery power using a fused 12V jumper lead.
If the motor spins cleanly and blows strong air out of the pressure port, the pump itself is undamaged. Next, inspect the air pump relay socket terminals. Verify that 12V battery power arrives at pin 30 and ignition power reaches pin 86. Ground pin 85 manually while checking pin 87 for battery output voltage. High contact resistance inside the relay frequently starves the pump of necessary operating amperage.
Inspecting the one-way check valves
Corroded check valves represent the most frequent point of mechanical failure. Detach the rubber delivery hose running from the pump to the combi-valve mounted on the exhaust manifold. Inspect the interior walls of the hose for black carbon soot or liquid water droplets. The presence of carbon confirms that exhaust manifold pressure has breached the internal diaphragm.
Attach a hand vacuum pump to the valve vacuum nipple. Apply 15 inches of mercury vacuum to the port. The valve mechanism must hold vacuum indefinitely without bleeding off. Blow low-pressure shop air through the inlet side while vacuum is applied to confirm internal shuttle movement. If the valve fails to hold vacuum or refuses to pass air under vacuum activation, replace it immediately.
Common diagnostic errors and preventive maintenance
Technicians often replace the secondary air pump without addressing the leaking check valve that caused the failure. Installing a fresh $300 electric pump downstream of a blown check valve destroys the new unit within 3 weeks. Hot exhaust gas will cook the new motor windings and melt plastic impellers.
Inspect all flexible vacuum lines connecting the intake manifold to the secondary air solenoid. Engine heat degrades thin rubber lines, resulting in splits, cracks, and vacuum leaks below 10 kPa. Replace aged rubber vacuum lines with heavy-duty silicone hoses to withstand engine bay temperatures above 120°C.
Resolving your secondary air injection system malfunction
Resolving this emissions fault requires verifying electrical supply, testing component integrity, and confirming bi-directional valve motion. Take the time to clear all exhaust passages and verify relay switching before declaring the job complete. Once all repairs are finished, clear the diagnostic trouble codes and perform a complete 15-minute cold drive cycle to verify that emissions monitors set to ready. Grab your test gear and inspect those one-way valves today.