
A gross evaporative emissions leak venting unburned hydrocarbons threatens catalytic converter longevity and instantly fails mandatory emissions testing. In my 15 years diagnosing stubborn powertrain faults, technicians waste hours replacing working gas caps without reading fuel tank pressure decay curves. We must isolate gross system opening thresholds exceeding 2.28mm (0.090 inch) with definitive pressure benchmarks. This guide explains how to fix large EVAP leak code P0455 efficiently using empirical circuit and pneumatic testing.
Mechanical Thresholds and Data Metrics for Code P0455
The powertrain control module (PCM) runs diagnostic monitor routines under strict ambient boundaries. Fuel level must sit between 15% and 85% capacity. Engine cold-start intake air temperatures must stay within 4°C to 30°C of engine coolant temperature. If these baseline prerequisites fail to line up, the engine computer suspends monitor execution completely.
The 0.090-Inch Diagnostic Threshold and Decay Metrics
Code P0455 indicates a gross atmospheric leak. The PCM commands the canister vent valve closed and cycles the purge solenoid open to generate engine manifold vacuum. A system without breaches achieves target vacuum within 15 seconds. If pressure drop fails to reach 1.75 kPa within 30 seconds, the monitor registers an opening larger than 2.28mm (0.090 inch). Vacuum decays instantly through open apertures. Small leaks generate code P0456, while code P0455 denotes catastrophic vapor loss.
Monitoring Fuel Tank Pressure Sensor Voltage
Live scan data clarifies mechanical responses instantly. Access the PID for fuel tank pressure (FTP) before unbolting any component. A functional three-wire sensor outputs approximately 2.5V at dead atmospheric rest. When manifold vacuum pulls down the fuel tank, voltage drops toward 1.25V on typical GM and Ford systems. Read raw voltage outputs directly. If the sensor remains stuck at 2.5V during purge actuation, you're looking at zero vacuum build or an internally shorted sensor signal line.
Step-by-Step Process to Fix Large EVAP Leak Code P0455
Don't guess when testing pneumatic fuel lines. Systematically isolating components prevents unnecessary parts swapping. Work from the easiest physical contact points down to the fuel tank belly.
Fuel Cap and Seal Pressure Verification
The filler seal fails more often than the metal latching cam. Remove the fuel cap and inspect the elastomeric O-ring under direct light. Check for dry rot, radial cracking, or debris along the filler neck mating face. Mount the cap to an adapter connected to a calibrated manometer and hand pump. Pump the assembly to 7.5 kPa. If the gauge drops more than 0.5 kPa within 20 seconds, discard the cap immediately.
Purge Valve Duty Cycle and Vacuum Sealing Tests
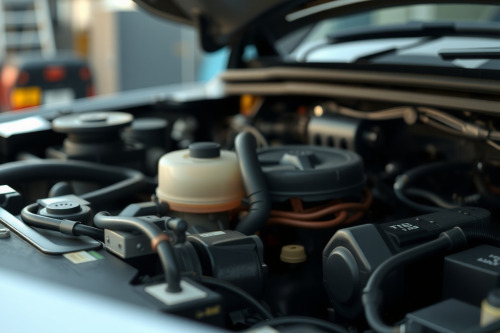
A mechanically stuck purge valve causes uncontrolled vapor intake or persistent venting. Locate the valve in the engine bay near the intake manifold. Disconnect the electrical connector and the vapor line leading back to the tank. Command the engine on. Place your finger over the open valve port; you must feel zero suction. If vacuum pulls continuously with zero command voltage, internal debris holds the pintle open. Measure coil resistance across the two pins using a digital meter. Healthy solenoids register 18 to 26 ohms at 20°C. Replace any valve exhibiting out-of-range resistance.
Vent Solenoid Bench Test and Actuation Checks
Corrosion ruins exposed vent solenoids mounted near rear subframes. These valves remain normally open to allow fresh air displacement during normal driving. Perform a direct vent solenoid bench test by applying 12V and ground directly across the coil pins. Listen for a sharp, mechanical click. While energized, blow low-pressure shop air (no more than 0.5 psi) through the port. Airflow must stop completely. If air passes through the valve under power, road salt or carbon particulate has jammed the internal seat.
Pinpointing Micro-Fissures with Smoke Machine Leak Detection
Visual inspections rarely expose cracks on top of fuel tanks. Using an automotive smoke machine leak detection unit is non-negotiable for large leaks. This method illuminates line punctures and cracked vapor seams within minutes.
Pressurizing the Vapor Lines Safely
Regulate nitrogen or inert smoke testing pressure strictly between 0.3 psi and 0.5 psi. Never exceed 1.0 psi, or you'll rupture internal bladder liners and tank seams. Connect the machine to the green service port Schrader valve using a reverse-thread adapter. Command the vent solenoid closed with a bidirectional scan tool. Introduce dense smoke and trace the hard nylon vapor lines running underneath the chassis. Check every quick-connect fitting and rubber transition hose for rising vapor clouds.
Inspecting the Evaporative Emission Control Canister
Plastic canisters crack from road debris impacts and severe off-road driving. Inspect the evaporative emission control canister body for spiderweb cracks near the molded port necks. Saturated carbon beds expand, fracturing ultrasonic weld seams along the perimeter. If liquid raw fuel drips from the canister during testing, liquid fuel has flooded the carbon matrix due to tank overfilling. A fuel-saturated canister breaks down internally, dispatching tiny charcoal pellets straight into the purge lines. Replace the entire canister module if structural cracks appear.
Data-Driven Validation: How We Confirm the Permanent Fix
Clearing diagnostic trouble codes does not prove a permanent repair. You must force the vehicle to run its onboard self-testing routines successfully. Reassemble all tested hoses with fresh quick-connect retaining clips.
Clearing Codes and Cold Start Drive Cycles
Erase code P0455 from PCM memory using your scan tool. Park the vehicle overnight to achieve complete temperature stabilization between the fuel tank and ambient air. Drive the vehicle through an urban-highway mix: 10 minutes of stop-and-go driving followed by 15 minutes of steady cruising at 88 km/h. During deceleration without braking, the PCM closes the vent valve and commands purge duty cycle up to 35% to execute the vacuum decay calculation. Verify that the EVAP monitor shifts from "Not Ready" to "Ready" status on your scan screen.
Baseline Vacuum Retention Limits
Perform a final manual line verification before returning the car to service. Hook up your smoke unit flow meter. With the vent valve commanded closed, the float ball must drop completely to 0.000 l/min. Any float hovering above the 0.020-inch marking proves a secondary leak remains in the system. Zero movement indicates total atmospheric sealing integrity across all 4.5 meters of underbody plumbing.
Strategic Field Recommendations to Fix Large EVAP Leak Code P0455
Prioritize testing valves dynamically before ordering expensive evaporative hardware. Bench-test the vent valve first, as exposed underbody wiring harnesses suffer from corroded grounds in 60% of verified code P0455 service cases. Verify continuous 12V supply at the connector pins before condemning the solenoid itself. Replace aged rubber J-hoses with fuel-vapor-rated SAE 30R7 hoses rather than generic coolant lines. When you execute these pneumatic checks systematically, you fix large EVAP leak code P0455 without guessing. Hook up your smoke diagnostic machine today to systematically eliminate vapor leaks and protect engine driveability.