
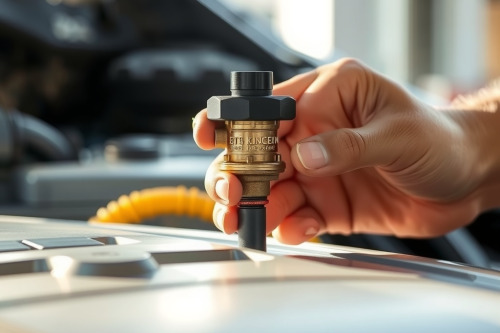
A stubborn P0443 diagnostic trouble code points to an electrical driver breakdown inside your emissions loop. I've seen technicians swap dozens of components unnecessarily because they failed to probe the harness under load. Proper execution of replacing a faulty EVAP purge control valve demands verifying coil impedance and ground switching integrity first. We will walk through the electrical measurements and physical removal steps that clear the fault permanently.
Diagnostic data and symptoms behind code P0443
Code P0443 triggers when the powertrain control module detects an abnormal voltage drop across the purge solenoid driver circuit. The ECM monitors output state continuously. When the commanded duty cycle doesn't match the return voltage on the control line, the check engine light illuminates within 2 drive cycles. You'll likely experience rough idle after refueling, erratic fuel trims, or hard starting conditions.
A mechanical failure differs from an electrical fault. Code P0440 or P0442 indicates an evaporative emission control system leak, whereas P0443 indicates a purely electrical circuit malfunction. Resistance values tell the real story. Bench test data shows healthy original equipment valves hold between 14 and 30 ohms at 20 degrees Celsius. An open circuit reads infinite resistance, while an internal coil short registers below 5 ohms. A shorted coil draws excessive current, often exceeding 2.5A, which risks frying the ECM driver channel entirely.
Electrical bench testing prior to replacing a faulty EVAP purge control valve
Never replace hardware without isolating the wiring harness. Disconnect the 2-pin connector at the purge solenoid. Turn the ignition key to the run position with the engine off. Measure voltage between the harness power supply pin and chassis ground using a digital meter. You must see battery reference voltage, typically between 12.2V and 12.6V.
Low or fluctuating voltage exposes harness corrosion or a blown emissions fuse upstream. If feed voltage meets specification, check the ground control circuit. The ECM modulates this line using pulse-width modulation at frequencies between 10Hz and 30Hz. Connect an automotive test light to battery positive and probe the ground trigger cavity while commanding the valve via bidirectional scan tool controls. Crisp flashing confirms your driver circuit operates correctly under real electrical loads.
Next, apply direct vacuum to test physical seat sealing. Use a manual hand pump to pull 16 inches of mercury on the inlet port. A functional valve holds that vacuum indefinitely with the harness unplugged. If vacuum bleeds off at a rate exceeding 1 inch of mercury every 10 seconds, the internal plunger seal is compromised by carbon debris sucked from the charcoal canister.
Step-by-step procedure for replacing a faulty EVAP purge control valve
Safety comes first when opening fuel vapor plumbing. Relieve residual tank pressure by unscrewing the fuel filler cap. Disconnect the negative terminal of the 12V battery to prevent transient voltage spikes during harness disconnection. The purge valve typically mounts directly to the engine intake manifold or an adjacent bracket on the firewall.
Disconnecting lines and releasing hardware
Depress the plastic quick-connect locking tabs on the vapor lines. Never pry these retaining clips with sharp screwdrivers. Hardened nylon lines snap easily under lateral force, turning a 20-minute repair into an expensive fuel line replacement. Slide the vacuum line backward off the valve barb carefully. Unbolt the mounting fasteners, which typically require an 8mm or 10mm socket. Remove the degraded solenoid assembly from the engine bay.
Seating and installing the replacement unit
Compare the new unit side-by-side with the old component. Confirm the flow direction arrow points toward the engine manifold, not back toward the vapor canister. Clean the mounting bracket surface thoroughly to eliminate rust scale. Install the new solenoid valve, torque the mounting bolts to 9Nm, and snap the quick-disconnect lines forward until you hear a solid mechanical click. Reattach the electrical connector firmly, ensuring the weather-pack silicone seal seats into the locking groove.
Common installation mistakes causing repeat circuit failures
Ignoring canister degradation causes recurrent valve failures within 500km. When liquid fuel floods the charcoal canister through continuous overfilling at the pump, activated charcoal pellets disintegrate into fine dust. Engine vacuum pulls this abrasive particulate straight into the valve chamber. The debris wedges the valve open, causing an EVAP purge valve circuit malfunction symptom mimic where the plunger sticks mechanically while coil resistance stays within tolerance.
Check the vacuum lines before bolting in your new part. Tap the disconnected vacuum line onto a clean white rag. If black charcoal granules fall out, you must blow out the line with 2 bar of compressed air and replace the vapor canister assembly immediately. Failing to blow the lines guarantees the replacement valve will clog during the next high-load purge cycle.
Post-repair verification and drive cycle validation
Reattach the negative battery terminal and clear all stored DTCs with an OBD2 scanner. A cleared code doesn't mean the repair is validated. You must initiate an active functional test. Start the engine and bring the coolant temperature above 80 degrees Celsius to enter closed-loop fueling.
Monitor short-term fuel trims while commanding the purge valve from 0% to 50% duty cycle on your scan tool. Short-term fuel trim values should shift negative as stored fuel vapors enter the plenum, followed by an immediate correction as the oxygen sensors read the richer mixture. Take the vehicle on a 15-minute road test incorporating steady cruising between 70km/h and 90km/h. Confirm the EVAP readiness monitor transitions from incomplete to ready status with zero pending fault codes.
Pragmatic recommendations for professional repair
Diagnosing P0443 fault code issues accurately saves hours of trial and error. Verify supply voltage, measure resistance against manufacturer specifications, and inspect the vapor circuit for carbon dust contamination. Complete your job by replacing a faulty EVAP purge control valve using certified replacement hardware rather than unbranded alternatives. Connect your diagnostic scan tool right now and run an active functional test to restore emission compliance.