
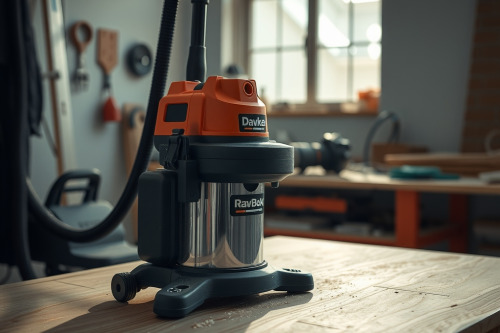
Routing deep mortises or profiling edge details without extraction ruins visibility and packs cutter flutes within seconds. Over 25 years on commercial jobsites, I've watched heavy chip build-up cause violent bit chatter and premature carbide dulling. If you want clean edges and safe passes, you must properly connect a shop vacuum to your router before pulling the trigger. Doing this clears waste immediately and keeps layout lines visible across every single pass.
Why you must connect a shop vacuum to your router
Trapped wood chips act like an abrasive heat sink. When shaving dense white oak or hard maple, trapped shavings recycle inside the sub-base rather than clearing out. This friction leads directly to burning the stock. It ruins expensive cutters and forces you to spend hours sanding away scorch marks.
Poor extraction causes mechanical failure. Fine sawdust packs into the collet bore, increasing runout and triggering sudden collet slip midway through an edge profile. When you run a handheld wood router with a high-velocity suction line, chips exit instantly. The tool runs cooler, vibration drops dramatically, and workpiece tear-out is minimized.
Sizing adapters and hoses to stop dust collection choke
Standard shop vacuum hoses measure 63mm outside diameter. Handheld extraction ports range from 25mm to 35mm. Forcing a rigid 63mm hose directly onto a handheld motor housing will destroy your balance and ruin cut precision. A heavy hose pulls the base off-kilter, altering your profile depth without warning.
Stepped rubber adapter fittings
Never rely on duct tape or rigid PVC reducers found in plumbing aisles. Buy durable stepped rubber adapter fittings that compress tightly over the specific shroud diameter of your base. Secure the connection with a 32mm stainless worm-gear clamp so vibration cannot pop the joint loose during aggressive hogging passes.
Selecting flexible dust extraction hose
Downsize from the primary vacuum intake down to an ultra-flexible 27mm or 32mm anti-static hose. Rigid plastic ribs catch on bench dogs and edge guides, causing unwanted resistance. Anti-static rubber construction eliminates annoying static electricity shocks while preventing fine sawdust from clinging to the interior walls. This step stops dust collection choke before it starves the motor cooling vents.
Overhead hose rigging to eliminate drag and bit chatter
Draping a vacuum hose across your workbench edge creates severe rotational drag. That pulling force tilts the base plate, leading to gouged edges, uneven dados, and dangerous bit chatter. I routinely suspend extraction lines directly above the central assembly table.
Rig an overhead hose suspension boom using a simple swivel arm or an elastic bungee cord anchored to the ceiling joist. Keep about 1800mm of free hose floating above the tool. This configuration carries the physical weight of the extraction line while providing 360-degree mobility around large sheet goods. You control the cut, not the suction hose.
Steps to connect a shop vacuum to your router on site
Follow this field-tested procedure to connect a shop vacuum to your router whenever setting up for clean joinery work.
Inspect the shroud and port seal
Blow clean compressed air through the motor housing before mounting your sub-base shroud. Check the clear acrylic chip deflector for cracks. Mount the factory dust shroud flush against the sub-base, tightening the retention screws until the gasket seats with zero play.
Insert an auxiliary separator
High-volume routing fills standard paper vacuum bags within minutes. Place an inline cyclone separator between the vacuum and your flexible line. This drops 98% of heavy shaving bulk straight into a dedicated 20-liter bucket, preserving maximum cubic feet per minute suction at the cutter head.
Lock hose joints and verify cord alignment
Slide your stepped adapter firmly onto the base port. Secure the electric power cord directly along the flexible suction hose with hook-and-loop straps spaced every 400mm. Marrying the power cord and vacuum line prevents tangles around table edges while routing wide arcs.
Managing airflow to prevent burning the stock and motor heat
Plunge cuts in solid lumber create extreme suction resistance inside fully enclosed shrouds. Excessive negative pressure can seal the sub-base to the timber like a suction cup, stalling your feed rate and burning the stock. Airflow must remain continuous.
Any detailed / complete wood router review will confirm that constant airflow cools the carbide cutting edges. If your vacuum draws too hard on delicate trim passes, crack open the bleed valve on your hose handle. Bleeding 10% to 15% of incoming vacuum pressure lets the tool glide effortlessly along the edge while capturing fine airborne dust particles.
Optimizing performance for the best wood router setup
Even the best wood router will bog down if swarf accumulates under the base. Run periodic maintenance checks on your extraction path every 3 hours of active cutting time:
- Empty the chip collector when it reaches 70% capacity to prevent vacuum motor overheating.
- Inspect the hose interior with a flashlight to detect dense shavings jammed across internal bends.
- Wipe down the collet taper with solvent to eliminate microscopic dust films before mounting shanks.
- Verify that sub-base mounting fasteners remain tight under active vibration.
Field deployment tips for dependable dust control
Don't wait until your workspace is buried under piles of airborne hardwood dust before dialing in your extraction. The decision to connect a shop vacuum to your router saves your respiratory health, extends bit sharpness, and yields pristine joint tolerances on every project. Inspect your adapter sizes, rig your overhead lines cleanly, and test your vacuum seal on a scrap board before making your primary cut.