
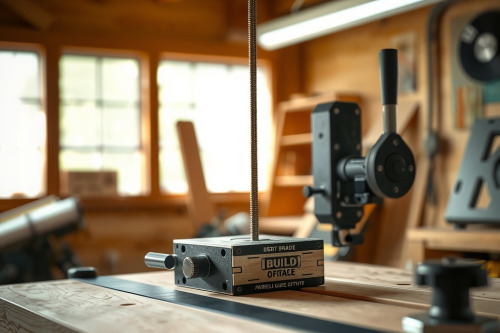
Ripping sheet goods on job sites with warped factory edges will wreck glue joints and blow project budgets. Over 22 years of finish carpentry, I've seen tracks slip and hand-guided cuts wander under load. Building a dedicated parallel guide jig for straight-line rip cutting eliminates fence deflection and operator error completely. Set your stops once, lock your base down, and produce repeatable mill-grade cuts every single pass.
Anatomy of a parallel guide jig for straight-line rip cutting
A dependable rip guide relies on structural rigidity, zero deflection, and reference edges that don't move under vibration. You need a base runner, twin indexed extension arms, and dual micro-adjustable stop blocks. When you plunge a solid carbide up-cut spiral bit into dense 19mm Baltic birch, lateral tool pressure tests every mechanical connection. Any slop in the guide rails instantly transfers to the cutline, leaving visible steps.
Critical dimensional tolerances
Build the main fence from 18mm phenolic-faced Baltic birch or 12mm extruded aluminum profile. Plywood with void-free cores resists warping across fluctuating site humidity. Mill your twin guide runners to exactly 90 degrees against the primary fence extrusion. A 0.2mm variance across an 800mm span doubles along an 2400mm rip. Keep your dual parallel tracks dead true with precision steel t-tracks set flush into machined dados.
Eliminating bit chatter and tear-out
Stock guide fences on standard handheld power tools flex when side loads shift. This tool deflection induces severe bit chatter, which ruins veneered plywood skins and gouges your reference face. A beefy sled structure captures your tool base completely, controlling vibration and eliminating nasty surface tear-out on delicate prefinished maple.
Material selection and base plate machining
Don't use standard MDF for jig components subjected to daily field abuse. Jobsite drops crush unreinforced MDF edges, ruining reference planes. Opt for 12mm cast acrylic, high-density polyethylene, or 18mm aircraft-grade birch plywood.
Machining the tool mounting carriage
Cut your carriage plate to 350mm by 300mm to provide ample bearing surface over raw stock. Counterbore mounting holes to secure your tool base with countersunk machine screws. Secure the stock against shifting using a heavy-duty toggle clamp mounted directly onto each lateral outrigger. Clean mounting geometry keeps your cutter at a true 90-degree angle to the timber face.
Feed rates dictate your edge quality. Move too fast and tool deflection induces severe scalloping. Crawl too slow and you'll end up burning the stock until resin glazes over the carbide cutters.
Mounting your wood router and setting up the guide rail
Choosing the right machine for long straight-line cuts requires balanced power and base stability. In any real-world wood router review, motor torque recovery under sustained load separates production tools from light-duty hobby motors. Your wood router must maintain consistent cutter velocity across continuous 2400mm ripping operations without thermally bogging down.
Arbor integrity and collet safety
Tighten your collets properly with dedicated open-end wrenches before securing the sled. Dirty collet cones and router vibration invite disastrous collet slip, which forces bits to creep downward mid-cut. That uncontrolled vertical travel alters your intended profile depth and cuts right into your sacrificial workbench.
Exhaust flow and dust extraction
Plunge cuts through sheet goods create massive volumes of fine airborne chips. A poor shroud design triggers a complete dust collection choke inside the guide channel within 10 seconds. Evacuate dust aggressively with a dedicated 36mm vacuum hose clamped to the machine carriage.
Calibrating the parallel guide jig for straight-line rip cutting
Calibration makes or breaks a parallel guide. Never trust the molded measurement scales stamped onto factory fence components. Zero out your physical stops using a precision 300mm steel rule or dependable digital caliper.
Establishing the zero-clearance reference edge
First, secure your guide base to sacrificial sawhorses. Power up your tool and slowly run a sizing pass directly through the sub-base runner. This cut creates a dedicated zero-clearance edge that lines up perfectly with the spinning teeth of the cutter. Line this trimmed reference edge right against your cut layout line on raw panels.
Squaring parallel extension arms
Square the twin outrigger arms to the cutline using a 3-4-5 drafting triangle method. Measure 600mm along the main fence and 800mm along the extension arm. The diagonal hypotenuse must measure exactly 1000mm. Tighten your locking hardware only after confirming these numbers on both sides.
Field techniques to avoid burning and edge defects
Even the best wood router can't save a cut executed with poor operator mechanics. Stand with your feet shoulder-width apart and walk down the panel in a steady, continuous progression. Stopping mid-panel leaves dark friction burns across dense hardwoods like hard maple and white oak.
Managing depth of cut in sheet goods
Never hog out 19mm hardwood ply in a single aggressive pass. Take an initial scoring pass at 3mm to establish a clean, tear-out-free edge along surface veneers. Follow with a main clearing pass at 10mm, then drop to full depth for the cleanup pass. Stepped passes keep motor strain low and prevent the cutter from wandering off line.
Direction of feed and climb cutting warnings
Push against bit rotation on straight rips to maintain control of the sled. Conventional feed forces the guide base firmly against your parallel stops. Climb cutting can snatch the carriage forward, creating massive safety risks on unanchored workpieces.
Maintaining accuracy and troubleshooting job site errors
Transporting jigs between commercial jobsites exposes aluminum rails and wood sub-bases to heavy impacts. Check your guide fence squareness at the start of every shift before cutting expensive panel inventory. Check mechanical fasteners for looseness caused by transit vibration inside work vans.
Keep guide channels clean of packed sawdust and dried adhesive. Apply paste wax or dry silicone spray to the sliding rails every 10 operational hours. Lubricated parts slide without binding, preserving consistent feed pressures and accurate rips.
Deploy this shop-built parallel guide jig for straight-line rip cutting on your next cabinet run or panel breakdown task. Stop fighting unreliable factory straightedges and wavy cuts. Build your parallel guide system this weekend, dial in the stops, and run your sheets with total confidence.