
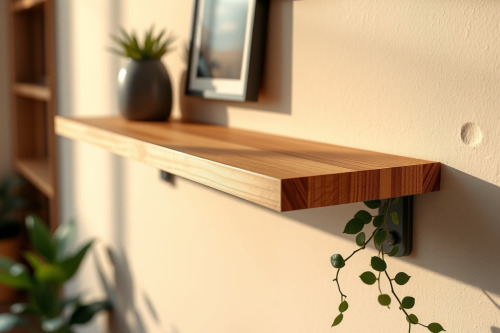
A sagging wall shelf reveals poor prep and sloppy joinery within weeks. Over 20 years on site taught me that hanging heavy stock without visible fasteners demands zero-tolerance layout work. If you want to build a custom floating wall shelf with hidden brackets that stays dead flat under 30kg of weight, you must mill the back edge accurately. One bad pass with your trim tooling will ruin an expensive 50mm slab.
Material Selection and Hardware Specs to Build a Custom Floating Wall Shelf with Hidden Brackets
Pick quarter-sawn oak, ash, or walnut dried to 8% moisture content. Wet lumber warps within 30 days and pulls your hidden posts out of plumb. Solid 12mm cold-rolled steel rods welded to a 5mm steel backplate give the sheer strength you need. Avoid hollow hollow-wall plastic anchors on heavy stock. Every solid stud mounting point must accept a 65mm structural lag screw.
Preparing the Timber Slab Without Stock Warp
Square the timber on your jointer and planer before touching handheld tools. Measure the thickness with a dial caliper to verify uniform dimensions along the 1200mm span. Discrepancies greater than 0.5mm cause binding when sliding the shelf over parallel blind rods. Plane the rear reference face flat and straight. A bowed back edge leaves an ugly gap against drywall.
Routing the Rear Channel and Avoiding Dust Collection Choke
Cut the clearance channel for the steel mounting strip using a dependable wood router. A quality plunge machine keeps the base flat on the rear edge. Hook up a 35mm suction hose immediately. Packed chips create a dust collection choke that obscures your layout line and cooks your cutter. Make passes in 3mm increments. Forcing the full cut depth causes burning the stock and premature edge dulling. Maintain steady feed speed to prevent unwanted bit chatter inside the mortise.
Plunge Mortising for Steel Backplates
Any wood router review worth reading emphasizes rigid motor housing clamps. Set your profile depth so the 5mm steel plate recesses flush with the shelf perimeter. A loose nut leads to collet slip, shifting the bit into an unintended 8mm gouge. Clamp sturdy sacrificial scrap to the front and back edges. This prevents tear-out on the rim of the channel during end-grain exit cuts. The best wood router for this job balances weight with continuous torque at 18000 RPM.
Anchoring the Hardware to Wall Studs
Find your wall framing studs using a rare-earth magnet or electronic sensor. Mount the hidden bracket using a precision 600mm spirit level. Shim behind the metal backing plate if the drywall bows outward. If the backplate twists, your shelf rods will spread apart by 2mm, locking the timber halfway during installation. Drive 65mm screws directly into the center of framing members. Test the bracket by applying 25kg of downward force directly onto the steel prongs.
Final Assembly: Build a Custom Floating Wall Shelf with Hidden Brackets Correctly
Bore rod holes into the shelf core using an extended 13mm brad-point drill bit and a rigid drill guide. Drill at least 5mm deeper than the steel rod length. Coat the rods with dry graphite powder instead of grease to prevent hydraulic lock. Push the shelf firmly against the wall. The rear edge must seat tight without rattling.
Inspect the shelf joint along the drywall with a feeler gauge to confirm an even seam under 0.5mm. When selecting hardware, discard bent rods and replace stripped mounting screws immediately. Master your tool setup, verify bracket alignment, and build a custom floating wall shelf with hidden brackets that will stand up to daily use. Mount your next shelf slab today.