
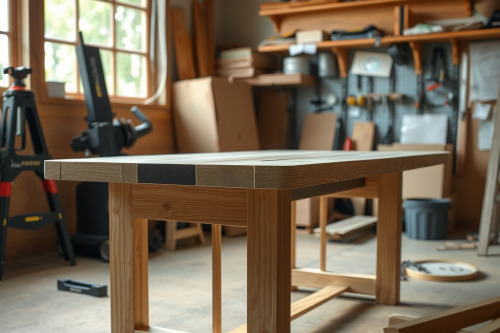
Thin, vibrating sheet-metal stands ruin clean joinery and turn routine profile cuts into scrap. Over 22 years in custom cabinetry, I learned that you can't expect surgical cuts if your workstation flexes under heavy feed pressure. You need to build a heavy-duty cabinet-style table that dampens motor vibration and anchors your production work.
Frame engineering to build a heavy-duty cabinet-style table
Lightweight stands shake loose under 3.25 HP motors. You must build mass directly into the lower carcass using 19mm Baltic birch or cabinet-grade plywood. Skip pocket screws on the primary structural joints. Cut 9mm deep dados and reinforce every horizontal shelf with structural adhesive and 50mm carcass screws. This mass absorbs motor resonance before harmonic waves reach the cutter.
Corner leveling and floor contact
Never let the base sit flat on uneven shop concrete. Install 4 heavy-duty commercial leveling casters rated for at least 150kg each. When dropped, the rubber feet isolate the frame from concrete floor moisture. Lock them down hard before taking any critical pass.
Sizing the carcass and dust collection cabinet design
Trapped chips kill router motors prematurely. You need a dedicated, sealed chamber for the power head measuring roughly 380mm wide by 450mm deep. Seal all internal seams with silicone sealant to eliminate air leakage. If airflow drops, internal temperatures rise quickly and thermal switches trip.
Optimizing CFM and airflow
Install a 100mm main port at the rear of the lower chamber. Run a 63mm branch line directly up to the fence. This balanced setup avoids a dust collection choke during heavy rebating operations. Mount a dedicated shop-vac or blast gate with an intake velocity above 20 m/s. Clean chambers mean clean cuts and longer switch life.
Flattening the top and router lift installation
A dead-flat top dictates your final profile depth across long rail stock. Glue 2 layers of 19mm MDF together using slow-cure PVA glue to build a 38mm core. Balance the assembly by laminating high-pressure laminate on both top and bottom faces. Balancing prevents seasonal cupping when humidity jumps 25% in mid-summer.
Plate alignment and leveling
Route the plate opening using a dedicated template and 12mm template bit. Drop your aluminum mounting plate into the stepped rebate. Level it flush to the laminate surface within 0.05mm using an accurate dial indicator. A plate sitting 0.2mm low catches timber edges, causing violent stock kicks and ruined workpieces.
Mounting your wood router and preventing setup failure
Any commercial wood router review stresses continuous torque under high load. When securing your wood router inside the lift assembly, clean the motor barrel with solvent. Grit or residual packing oil induces unwanted creeping during high-RPM operations. Torquing down the clamping collar firmly prevents catastrophic motor shifting mid-pass.
Eliminating bit deflection and runout
Seat cutters cleanly into 12.7mm collets without bottoming them out against the arbor. Leaving a 3mm gap prevents bottom binding and catastrophic collet slip under heavy lateral thrust. Dull cutters run at incorrect feed speeds cause bit chatter and immediately ruin edges. Run large panel-raising bits at 12000 RPM and smaller flush-trim bits up to 21000 RPM. Improper speed causes excessive friction, quickly burning the stock and ruining tool temper.
Tuning fences to build a heavy-duty cabinet-style table setup
A flexing fence guarantees inconsistent joint fit across production runs. Fabricate the sub-fence from an extruded 80x40 aluminum profile mounted to a 19mm laminate sub-base. Face the aluminum with adjustable sub-jaws made of dense phenolic board. Split faces let you close the gap around different / several bit diameters, preventing grain drop and dangerous tear-out on trailing grain.
Micro-adjuster setup
Rigid lock-down knobs alone make fine adjustments frustrating. Fit brass micro-adjusters with 1mm thread pitches to both fence ends. Fine-pitch adjusters let you dial in precise cut depths for tenon shoulders. Check your fence alignment parallel to the miter track before locking the back levers down.
Shop testing and final deployment
Deploying the completed workstation requires careful structural verification before plugging into mains power. Inspect collet runout, check fence squareness against the table face with a precision square, and run a sample cut in scrap hard maple. Selecting the best wood router for the lift determines your long-term success with heavy raised panels. Build your base plumb, lock the leveling casters firmly, and test your new machine on standard shop stock today.