
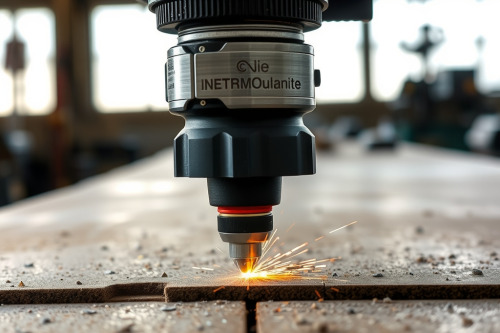
A sloppy groove ruins expensive hardwood faster than a dull blade on wet framing timber. I have scrapped dozens of cabinet panels because someone rushed the plunge setting and relied on stamped depth scales. You must adjust cutting depth accurately to stop blown mortises, violent bit chatter, and ruined workpieces before you ever touch spinning carbide to oak. Locking down your setup eliminates catastrophic field errors right at the bench.
Mechanical tolerances: why you must adjust cutting depth accurately
Relying on built-in stamped metal rulers is professional suicide. Stamped depth indicators on typical base housings carry slop of up to 1.5mm straight out of the box. That variance creates loose dados, uneven lap joints, and mismatched shelf elevations. When you adjust cutting depth accurately, you calibrate the tool against the physical stock rather than an arbitrary sticker on the motor housing.
Bit deflection ruins joinery instantly. Pushing a straight bit through 19mm dense maple in one go causes the bit shank to flex 0.3mm off perpendicular. This deflection produces uneven slot walls and burns the lumber. Setting precise fractional increments keeps cutting forces centered on the tool axis. The machine runs cooler, your edge profiles remain square, and the finished joint seats tight without dry-fit shimming.
Zeroing the plunge mechanism and setting reference stops
Accurate grooves require true zero indexing. Unplug the motor before touching the collet or adjusting hardware. Lower the cutter until the carbide edge kisses a flat brass reference block sitting on your timber face. Lock the plunge clamp securely. Slide your depth stop rod down to the lowest step on the rotating turret stop, then zero out your scale indicator.
Calibrating step cuts with physical gauge blocks
Never eyeball plunge increments on high-end millwork. Use machined brass setup blocks rather than tape measures. A dedicated dial indicator mounted directly to your router carriage will expose baseline mechanical play down to 0.01mm. Drop a 6mm setup block beneath your depth stop rod to cut the initial roughing channel without guessing.
Multi-pass strategies to kill bit chatter and tear-out
Hogging out a 12mm deep slot in single pass destroys cutters and stock. Deep cuts generate extreme centrifugal harmonics, introducing bit chatter that ripples across groove sidewalls. Make 3 graduated passes of 4mm depth instead. This technique preserves the motor brushes and leaves zero tool marks along the grain lines.
Take light finish passes on difficult grain. Swapping between climb cuts and push cuts requires discipline. Removing only 0.5mm on your final cleanup pass eliminates tear-out along brittle timber edges. It also prevents burning the stock when you hit resin pockets in cherry or walnut.
How to adjust cutting depth accurately with micro-adjusters
Coarse adjustment mechanisms get you within 2mm; fine micro-adjusting collars finish the job. Thread pitches on precision adjustment screws typically advance the bit 1mm per complete 360-degree rotation. Mark your collar with high-visibility paint pen so you can track quarter-turns on dim job sites.
Even the best wood router will betray you if the micro-adjuster locking screw stays loose during operation. Vibration backs the threaded rod off its seat by 0.2mm per linear meter of routing. Tighten the secondary brass lock nut before pulling the trigger. Any solid wood router review highlights locking-collar rigidity for this exact reason, as sub-base movement accounts for half of all failed groove depths.
Mitigating collet slip and dust collection choke
Mechanical creep ruins your profile depth without warning. When dust builds up inside the split collet, the bit shank can't seat properly. Under heavy feed resistance, this triggers collet slip, pulling the bit downward and carving unintended 3mm divots into your work.
Maintain your tool hardware aggressively on site. Clean the collet bore and bit shanks with solvent every 10 work hours to strip resin glaze. Check your extraction hose angle during deep groove cuts. Dense chips packing the cut channel cause a sudden dust collection choke, trapping heat around the cutter and expanding the collet ring mid-pass.
Field inspection protocols for repeatable precision
Run a test dado on a project off-cut before committing to production timber. Measure the test slot with digital depth calipers across 3 points: the entry, the center, and the exit. If depth varies by more than 0.15mm, inspect your plunge base guide rods for dried pitch or spring tension binding. A quality wood router delivers dependable results only when you maintain the plunge springs and base plate true to the spindle centerline.
Always adjust cutting depth accurately before executing final joinery cuts on site. Take your measurements from the actual workpiece, lock down your plunge stops with double checks, and test-cut scrap stock before running your project material.