
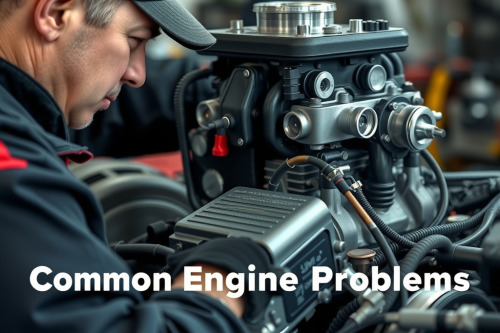
Burning through a 10-hour shift without turning flag hours will break your spirit. Over 25 years of busting knuckles on shop floors, I learned that jumping straight to part-swapping empties your wallet and kills efficiency. Getting a grip on common engine problems and how to repair them requires an unyielding diagnostic process rooted in baseline mechanical facts. Verify your basics first so you avoid turning a simple fix into an endless nightmare.
Isolating rough idle and cylinder misfire issues
Misfire codes like P0300 through P0308 will flood your bay every single week. Grab your OBD2 scanner and pull live data before touching a single wrench on that engine. Look at short-term fuel trim and cylinder misfire counters on your rolling cart display. If cylinder 3 shows 42 misfires in 200 revolutions, swap the ignition coil with cylinder 1. Clear the code and run the vehicle under load.
Checking spark delivery and fuel injectors
Verify whether the misfire tracked to the next cylinder. If the fault moves, your ignition coil is dead. Replace it immediately. If the fault stays glued to cylinder 3, you're dealing with a fuel injector failure, harness damage, or an internal mechanical loss. Check injector coil resistance using your digital multimeter. A standard port injector must read between 11 and 16 ohms at 20 degrees Celsius. Anything showing an open circuit or dropping below 2 ohms requires replacement.
Tackling common engine problems and how to repair them: thermal failures
Overheating will destroy an aluminum cylinder head in under 5 minutes. Customers routinely drive until the temperature gauge pins into the red zone, cooking head gaskets and warping mating surfaces. Pressurize the cooling circuit to 15 psi using a manual pressure tester. Watch the analog dial for 10 minutes. A rapid pressure bleed down without visible external puddles means coolant is entering the combustion chambers or engine crankcase.
Inspecting circulation and cooling hardware
Remove the drive belt to feel the bearing play on the water pump. If the pulley wobbles or the weep hole shows crusty coolant deposits, discard the unit. Replace the thermostat as mandatory preventative insurance whenever severe overheating occurs. Cheap thermostats stick shut and cause repeat head gasket failures. Bleed all trapped air pockets using a spill-free funnel system before releasing the vehicle.
Diagnosing low oil pressure and valvetrain noise
Ticking lifters and flickering oil pressure warning lamps demand zero hesitation. Never trust a dashboard warning lamp or factory sending unit when dealing with low oil pressure causes. Screw a calibrated mechanical oil gauge directly into the primary oil galley port. Start the engine and measure pressure at operating temperature. Typical engines must maintain at least 10 psi per 1000 RPM, with a minimum of 25 psi at hot curb idle.
Repairing lubrication system bottlenecks
Pressures dropping below 15 psi at hot idle indicate severe problems. Drop the oil pan to inspect the oil pickup screen. Sludge buildup, broken plastic timing guide chunks, or silicone gasket debris frequently choke off oil supply to the pump. Clean the screen completely with solvent or install a fresh oil pickup tube. If journal bearing clearances are washed out, budget for a complete bottom-end rebuild rather than relying on heavy-weight oil band-aids.
Tracking down unmetered air and vacuum leaks
Unmetered air entering downstream of the mass airflow sensor creates lean running conditions, erratic idle speeds, and P0171 codes. You can't identify hairline intake cracks by simply spraying chemical cleaner around hot exhaust manifolds. Connect an automotive smoke machine to the brake booster vacuum line with the engine off. Seal off the air intake tube with a rubber bladder.
Analyzing fuel trim corrections
Introduce smoke at 1 psi and shine a high-intensity inspection light along vacuum hoses, intake manifold gaskets, and PCV valves. When smoke escapes, replace the dried-out rubber hose or intake gasket set directly. Take the vehicle on an extended test drive while watching scan tool live data. Fuel trims must settle between -5% and +5%. If fuel trims remain pegged above +18% at idle but drop toward normal under load, you still have unmetered air entering the system.
Procedures for common engine problems and how to repair them in busy shops
Working as a flat-rate tech means speed and precision find your paycheck. Chasing bad guesses will drop you into a brutal diagnostic rabbit hole that destroys your effective hourly rate. Organize your diagnostic sequence: verify the customer complaint, check basic mechanical integrity via relative compression testing, and verify fuel pressure before touching electrical circuits. Following this strict order cuts unnecessary bay time by at least 35%.
Double-check all electrical connector locks and ground terminals before tightening the final bolt. Clean ground contacts down to bare metal using a wire brush to eliminate phantom voltage drop issues. Preventing comebacks depends entirely on testing the repair under the exact operating parameters that triggered the initial breakdown.
Execution on the shop floor
Systematic workflows separate competent technicians from amateur parts changers. Resolving common engine problems and how to repair them boils down to respecting base mechanical rules rather than gambling on forum guesses. Verify your baseline numbers, use dependable diagnostic equipment, and measure tolerances strictly against factory service data. Pull the vehicle into your bay, hook up your test equipment, and systematically eliminate failure points until the root cause is solved.