
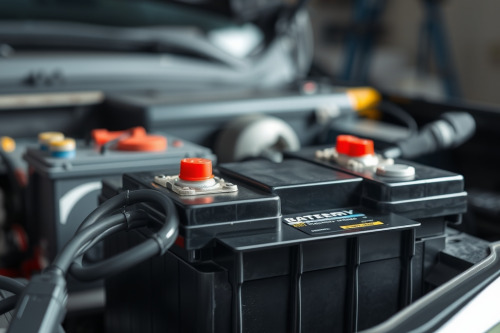
A sudden no-start condition stalls daily operations and costs billable shop hours. I see technicians misdiagnose healthy starters every week when the real culprit is electrochemical failure. Mastering how to diagnose car battery problems eliminates expensive guesswork and pinpoints degraded cells instantly. Follow our bench-tested procedures to isolate your electrical faults accurately.
Recognize Common Dead Battery Symptoms on the Driveway
You must observe physical clues before grabbing test probes. A battery rarely dies without providing distinct mechanical warnings. Starter drag indicates weak plate reaction.
Cranking Behavior and Starter Drag
Turn the important and listen closely to the starter motor. A slow, labored crank usually signals insufficient cranking amps. If you hear a rapid clicking sound, the solenoid can't hold engagement. Dimming dashboard lights during ignition reinforce these classic dead battery symptoms. Always note whether the engine cranks slower after sitting overnight.
Parasitic Draw and Terminal Oxidation
Corrosion restricts current flow between the post and terminal clamp. Inspect the battery tray for white or bluish lead sulfate crust. High resistance across oxidized connections mimics complete cell failure. Clean every contact point with a wire brush before taking voltage readings.
How to Diagnose Car Battery Problems with a Multimeter
Voltage measurement reveals the internal state of charge immediately. Digital multimeter testing provides an objective look into chemical stability without removing the unit from the vehicle.
Static Open-Circuit Voltage Thresholds
Set your rotary dial to 20V direct current. Connect the red probe to the positive terminal and black to negative. A fully charged unit reads 12.6V or higher across the terminals. A reading of 12.4V reflects a 75% state of charge. When resting voltage drops to 12.0V, the chemistry is 75% depleted. Anything below 10.5V indicates a shorted internal cell or irreversible sulfation.
Surface Charge Removal Protocol
Never measure static voltage immediately after operating the engine. Alternators produce a superficial surface charge on plate surfaces that skews meter readings. Turn on the high-beam headlights for 60 seconds to bleed this artificial layer. Switch the lights off, wait 120 seconds, and record your baseline voltage. For flooded cells, verify specific gravity across each cell using a calibrated hydrometer to identify weak compartments.
Perform a Car Battery Load Test Under Real Demands
Static voltage tests do not tell the whole story. A degraded core can show 12.6V yet collapse instantly under starter draw. You must conduct a formal car battery load test to verify amperage capacity.
Carbon Pile Tester Calibration
Check the cold cranking amps rating stamped on the top case. Divide that rating by 2 to determine the correct test load. For example, a 600 CCA unit requires an applied load of 300A. Connect the heavy clamps securely to clean lead posts.
Voltage Drop Analysis During Cranking
Apply the carbon pile load for exactly 15 seconds. Observe the meter needle throughout the duration of the test. The voltage must remain at or above 9.6V at an ambient temperature of 21°C. If the meter plummets below 9.0V within 5 seconds, replace the unit immediately. You cannot revive plates with shed active paste.
How to Diagnose Car Battery Problems in Charging Systems
Never condemn an energy storage unit without verifying the charging loop. An underperforming alternator depletes a brand-new component within 3 operating days.
Alternator Output Verification
Start the vehicle and monitor terminal potential at idle. An alternator charging test should display between 13.8V and 14.5V across the battery lugs. Turn on the cabin blower, defroster, and headlights to create maximum electrical resistance. The regulator must maintain at least 13.5V under this continuous working load.
Differentiating Battery Failure from Alternator Wear
Excessive charging voltage destroys plates through electrolyte boiling. Readouts exceeding 15.0V point to a failed internal voltage regulator. Conversely, readings under 13.0V while running mean the alternator diodes or stator windings have failed. Resolve charging loop defects before installing replacement units.
Inspect Physical Enclosures and Electrolyte Balance
Visual verification uncovers defects electrical meters occasionally miss. Bulging outer cases show severe overcharging from sustained thermal runaway. Warped plastic shells mean internal plates have expanded and buckled.
Low fluid levels expose lead grids to atmospheric oxygen, causing permanent oxidation. If plates are dry, add distilled water until reaching the splash rings. Never add tap water because mineral deposits poison electrochemical reactions.
Field Recommendations for Electrical System Maintenance
Accurate field diagnostics save fleet budgets and keep vehicles operating reliably. Don't replace hardware based on guesswork. Measure resting values, strip surface charge, and verify charging output before declaring a component dead. Use these testing protocols to diagnose car battery problems on your vehicle today, and inspect your electrical connections every 6 months to prevent sudden failures.