
Modern vehicles confuse drivers because intermittent faults mask mechanical failure until catastrophic damage occurs. In my 15 years running automotive diagnostic bays, guesswork always costs three times more than systematic testing. You'll learn exactly how to diagnose common car problems using practical shop steps instead of throwing parts at symptoms. Master these procedures before touching a single bolt.
Establish a baseline to diagnose common car problems
Never begin a tear-down based on a hunch. You must establish documented baseline data before unbolting components.
Reading live telemetry with an obd2 diagnostic scanner
Plug an obd2 diagnostic scanner directly into the data link connector under the dashboard. Check for active DTCs, pending codes, and freeze-frame data. Freeze-frame captures provide the exact engine load, vehicle speed, coolant temperature, and fuel trim values recorded at the moment of failure. If the short-term fuel trim reads 18% while long-term fuel trim sits pinned at 22%, the computer is compensating for severe unmetered air entering downstream of the mass airflow sensor. Clear nothing until you record these values.
Visual and sensory inspection routines
Pop the hood with the engine cold. Inspect every harness for chafing against sharp engine brackets. Feel the vacuum lines for brittle plastic or soft, oil-swollen rubber elbows. Listen for high-pitched hissing sounds near the intake manifold plenum during idle. Your eyes and ears locate 30% of driveability complaints before you pick up specialty tooling.
Isolating rough running and engine misfire symptoms
An engine shaking violently under acceleration indicates an imbalance in ignition, fuel delivery, or mechanical compression.
Ignition secondary circuit breakdown
Address suspected engine misfire symptoms by isolating the faulty cylinder. Modern direct-ignition systems place heavy stress on pencil coils. Remove the coil pack on the misfiring cylinder and inspect the rubber boot for white carbon tracking lines. Measure primary coil resistance across terminal pins 1 and 2, which should read between 0.5 and 1.5 ohms on healthy units. Check the spark plug gap using a wire feeler gauge. If the electrode gap exceeds the 0.044 inch factory specification by more than 0.010 inches, ignition voltage demands will exceed coil secondary output limits.
Systematic fuel pressure testing
Perform precise fuel pressure testing when fuel starvation causes multiple cylinder lean codes. Connect a mechanical gauge to the Schrader valve on the fuel distribution rail. Turn the ignition important to the run position to prime the pump. Rail pressure must jump immediately to specification, typically between 3.5 bar and 4.2 bar for port injection systems. Start the engine and watch the needle for erratic flutter. A needle vibrating rapidly across a 0.5 bar range points directly to a failing pressure regulator diaphragm or a restricted inline fuel filter.
Mastering basic car electrical troubleshooting
Electrical gremlins waste shop labor when technicians fail to test circuits under real operational loads.
Parasitic battery drain testing
Dead batteries in the morning indicate an active parasitic draw from an unlatched control module. Park the vehicle, latch the hood switch manually, lock the doors, and wait 30 minutes for CAN bus networks to enter sleep mode. Connect your multimeter in series between the negative battery post and the disconnected ground cable clamp. Set the tool to the 10A DC scale. Parasitic draw should settle below 0.050A. If the meter registers 0.450A, pull interior fuses one by one until the current drops, identifying the faulty subsystem instantly.
Voltage drop across heavy ground terminals
Execute disciplined car electrical troubleshooting on high-amperage cranking paths. Resistance measurements using an ohmmeter fail because unpowered circuits don't reveal high-resistance connections under heavy load. Switch your meter to DC volts and place one probe on the negative battery post and the other on the starter motor casing. Crank the engine. A reading higher than 0.2V indicates severe corrosion or loose mounting fasteners along the ground return path.
Chassis dynamics and resolving brake pedal pulsation
Vibrations felt through the brake pedal or steering wheel demand immediate mechanical measurement rather than blind component replacement.
Lateral runout inspection on rotors
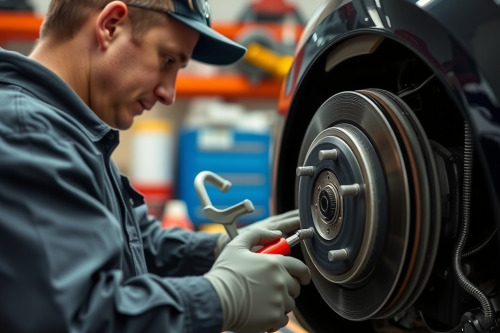
Severe brake pedal pulsation under moderate deceleration stems from thickness variation caused by rotor runout. Mount a dial indicator with a magnetic base rigidly to the steering knuckle. Position the indicator stylus 10mm inward from the outer friction edge of the brake disc. Rotate the wheel hub by hand through 360 degrees. Lateral runout exceeding 0.002 inches causes the brake pads to wear the rotor unevenly over 3000 to 5000 miles. Clean rust scale from the hub mating face before deciding to condemn or turn the rotor.
Suspension bushing deflection checks
Raise the vehicle on a two-post lift to unload the control arms. Insert a 600mm steel pry bar between the control arm subframe mount and the inner bushing sleeve. Apply moderate leverage. Look for torn rubber, oil leakage from hydraulic bushings, or free play exceeding 2mm. Loose suspension hardware mimics brake problems by shifting wheel caster during braking events.
Workshop tactics to diagnose common car problems
Fast-track complex failures using disciplined fluid analysis and component temperature monitoring.
Isolating drivetrain fluid contamination
Pull transmission and differential dipsticks before starting diagnostic road tests. Milky engine oil confirms coolant intrusion through a breached cylinder head gasket or cracked engine block. Burnt, blackened automatic transmission fluid smelling of sulfur indicates slipping clutch packs. Metallic sheen inside fluid samples confirms bearing or gear tooth spalling requiring complete unit overhaul.
Thermal profiling with infrared cameras
Scan the cooling system using a handheld infrared thermometer or thermal camera. Aim the sensor at the radiator inlet and outlet tanks with the engine at operating temperature. A temperature drop of 10C to 15C across the core confirms proper heat transfer. Zero temperature drop indicates complete coolant flow blockage, pointing directly to a seized thermostat or a water pump with sheared impeller vanes.
Field deployment and diagnostic verification
Never release a vehicle after repair without rigorous road testing under the exact conditions that triggered the initial fault. Follow a clear step-by-step procedure to diagnose common car problems accurately before replacing functional assemblies. Grab your diagnostic gear, verify every system parameter with calibrated tools, and solve the failure at its root cause.