
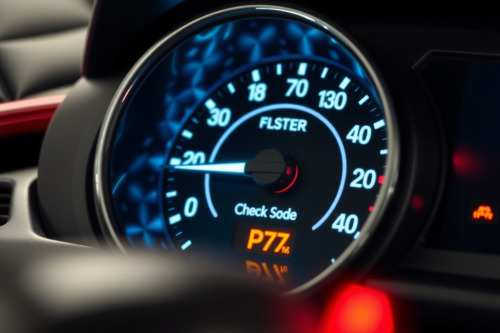
A flashing amber indicator on your instrument cluster signals an active cylinder misfire that destroys your catalytic converter within 15 minutes of continuous driving. In my 12 years running shop diagnostics, ignoring this warning always converts a 50-dollar repair into a 1500-dollar exhaust overhaul. You need an aggressive, systematic testing sequence rather than swapping unverified parts at random. Master how to fix a check engine light by isolating exact diagnostic trouble codes before turning a single wrench.
Initial Triage: Reading Codes to Learn How to Fix a Check Engine Light
Never disconnect the battery terminal to erase a dash warning. Clearing volatile memory wipes vital freeze-frame records that document fuel rail pressure, engine coolant temperature, and intake manifold absolute pressure at the moment the fault triggered. Connect an OBD-II diagnostic scanner to the 16-pin data link connector beneath the driver-side dash panel. Turn the ignition switch to the run position without starting the starter motor.
Distinguishing Active and Pending Fault Codes
Your engine control module categorizes faults into distinct memory banks. Active codes illuminate the dashboard lamp instantly because the fault repeated across consecutive driving cycles. Pending codes represent single-cycle failures waiting for verification. Read the freeze-frame dataset immediately. If code P0300 displays alongside a fuel trim reading exceeding 20%, you're dealing with a severe vacuum leak or weak fuel pump rather than a defective control module.
Inspecting Mechanical Seals and Basic Hardware
Always inspect physical components before condemning electronic modules. An unsealed filler neck remains the most common trigger for an evaporative emission system leak. Remove the fuel cap, inspect the Viton O-ring for dry rot or micro-cracks, and listen for 3 distinct mechanical clicks during installation. A loose cap routinely triggers code P0442 or P0455 within 40 kilometers of highway operation.
Examine the vacuum circuit across the intake tract. Cracks in brittle 4mm rubber tubing pull unmetered air behind the throttle body, skewing airflow calculations. Check each spark plug directly if misfire codes register between P0301 and P0308. Worn electrode gaps exceeding 1.1mm force ignition coils to demand excessive secondary voltage, eventually frying coil drivers inside the ECU.
Diagnostic Procedures: How to Fix a Check Engine Light Triggered by Sensors
Sensor failures demand dynamic live-data verification under operating conditions. A faulty upstream sensor disrupts closed-loop fueling completely, causing rough idling and heavy soot output at the tailpipe. Bench testing components eliminates guesswork entirely.
Testing Oxygen Sensors and Mass Airflow Meters
Hook a digital multimeter or live scan tool to the primary bank 1 oxygen sensor. The signal wire must oscillate rapidly between 0.1V and 0.9V at 2500 RPM once the engine reaches 90°C. Sluggish transitions slower than 300 milliseconds confirm sensor contamination. Complete an oxygen sensor replacement only after checking for exhaust header leaks upstream of the bung. A pinhole crack draws outside air, tricking the sensor into commanding full rich fuel delivery.
For mass airflow faults showing P0101, unclip the intake boot. Inspect the exposed platinum hot-wires under focused LED light. Oil residue from aftermarket air filters coats the wire element, creating false low-mass readings. Spray the sensor head generously with dedicated solvent cleaner, allow 10 minutes drying time, and recheck live grams-per-second values at idle.
Evaluating Fuel Delivery and Ignition Performance
Fuel starvation produces lean running codes P0171 and P0174 across both cylinder banks simultaneously. Mount a manual pressure gauge onto the Schrader valve of the engine fuel rail. Standard port-injection systems demand sustained pressure between 3.0 bar and 4.2 bar under rapid throttle blips. If fuel pressure drops more than 0.5 bar during engine acceleration, replace the fuel filter and test the fuel pump relay contacts for electrical pitting.
Ignition coil pack breakdown happens under high cylinder load. Swap the suspect coil to an adjacent cylinder to confirm hardware failure. If fault code P0302 migrates to P0303 following the coil swap, the coil winding is open. Replace the failing unit immediately with an original equipment manufacturer part to preserve steady spark output.
Completing Drive Cycles and System Readiness Reset
Erasing fault codes resets internal readiness monitors to an incomplete state. State emission inspection systems automatically reject vehicles displaying incomplete catalytic converter efficiency or evaporative purge monitors. Complete a full drive cycle on open asphalt to reset these parameters properly.
Maintain 88 km/h on a level highway for 15 minutes with steady throttle input. Decelerate smoothly to 30 km/h without touching the brake pedal to initiate catalyst monitor self-tests. Park the vehicle, let the engine idle in drive for 2 minutes, and confirm scanner readiness monitors display ready across all powertrain categories.
Final Workshop Checklist on How to Fix a Check Engine Light
Systematic diagnosis saves valuable garage time and shields your budget from haphazard parts-cannon tactics. Pull all stored codes, scrutinize freeze-frame parameters, and test basic electrical references before tearing apart intake or exhaust manifolds. Verify each repair using live streaming telemetry rather than hoping the dashboard light simply stays extinguished. Grab your diagnostic scanner, read the current codes on your vehicle, and execute these precision troubleshooting steps immediately.