
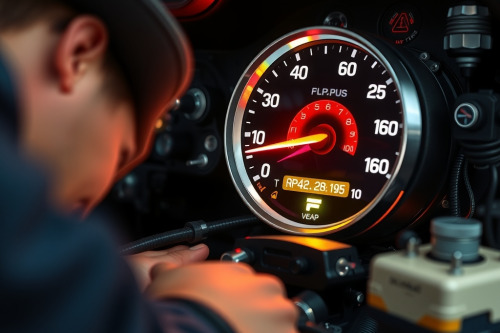
An amber warning lamp on your dashboard indicates a registered fault code in the engine control module. After spending 15 years servicing modern vehicle powertrains, I've seen drivers waste hundreds of dollars swapping random sensors before identifying the root failure. Learning how to fix a check engine light requires methodical diagnostic routines rather than blind parts replacement. Start with systematic scanning to protect your catalytic converter and engine internals from progressive degradation.
Initial triage: steady versus flashing warning lamps
Look at the behavior of the indicator lamp immediately. A solid light signifies a stored diagnostic trouble code that doesn't demand an immediate roadside shutdown. You can drive the vehicle home or to the workshop under moderate load. A flashing lamp signals an active cylinder misfire capable of melting the substrate inside your catalytic converter within 5 miles. Pull over safely and shut down the engine if the light flashes continuously. Unburnt fuel dumping into the exhaust creates temperatures exceeding 800 degrees Celsius, destroying exhaust components rapidly.
Using an OBD-II scanner to read trouble codes
Every vehicle manufactured after 1996 features a standardized 16-pin connector under the dashboard. Connect a handheld diagnostic unit to communicate with the powertrain control module. Turn the ignition switch to the accessory position without starting the engine.
Retrieving active and pending DTCs
Command the tool to read trouble codes across all powertrain modules. Active codes represent continuous electrical or mechanical faults verified by two consecutive drive cycles. Pending codes represent single-cycle events that haven't yet illuminated the dashboard lamp. Record the alphanumeric string, such as P0300 or P0420, alongside freeze-frame parameters. Freeze-frame records engine speed, coolant temperature, fuel trim percentages, and calculated load at the exact instant the fault occurred.
Common root causes and how to fix a check engine light
Field experience shows that 80% of warning lights stem from simple air-fuel metering errors or evaporative leaks. Address these subsystems systematically before purchasing expensive electronic control modules.
Checking the EVAP system and loose gas cap
Evaporative emission control codes frequently stem from a loose gas cap or degraded rubber O-ring seal. Inspect the fuel filler neck for surface corrosion, debris, or distortion. Tighten the cap until you hear 3 distinct mechanical clicks, or replace the seal if it shows micro-cracks. Clear the fault code and run the vehicle for 20 miles to verify that the EVAP gross leak monitor resets properly.
Diagnosing a faulty oxygen sensor
An upstream or downstream sensor monitoring the exhaust stream suffers thermal fatigue over 80,000 miles. A faulty oxygen sensor produces skewed voltage signals between 0.1V and 0.9V, forcing the engine computer into an erroneous rich or lean trim cycle. Remove the sensor wiring harness and measure heater circuit resistance using a multimeter. An open circuit or resistance exceeding 30 ohms confirms internal element failure requiring direct mechanical replacement.
Inspecting intake passages and vacuum integrity
Contamination on the platinum sensing wire of the mass air flow sensor skews intake metering. Spray dedicated electrical contact cleaner onto the wire assembly, avoiding direct mechanical contact. Simultaneously inspect PCV vacuum hoses for brittle rubber elbow connectors. A microscopic vacuum leak downstream of the throttle body introduces unmetered air, driving long-term fuel trim values above 15%.
Advanced bench testing: when simple fixes fail
Complex mechanical issues require component-level verification before concluding how to fix a check engine light on your specific platform. Inspect secondary ignition components whenever random misfire codes appear. Test ignition coil secondary resistance and verify that spark plug gaps remain within 0.7mm to 1.1mm according to factory specifications. Perform an engine cylinder compression test if misfires persist on isolated cylinders. Low cylinder pressure below 9 bar indicates valve sealing failure or piston ring blow-by rather than an electronic sensor issue.
Verifying repairs: drive cycles versus clearing codes
Erasing trouble codes via a scan tool clears all stored OBD-II readiness monitors. Do not rush to an emissions inspection station immediately after wiping the memory. Complete a full OBD-II drive cycle consisting of cold engine idling for 5 minutes, sustained cruising at 55 mph for 15 minutes, and decelerating without touching the brake pedal. Verify that every internal system monitor shows a status of ready on your scan display before returning the vehicle to regular duty.
Practical takeaways on how to fix a check engine light
Troubleshooting powertrain faults demands disciplined data interpretation over guesswork. Stop replacing expensive hardware based purely on generic internet code descriptions. Connect a dependable scanner, review live fuel trims, bench-test individual components, and execute a complete drive cycle to confirm the solution. Plug in your diagnostic scanner right now to read active codes and begin addressing your vehicle's engine issues methodically.