
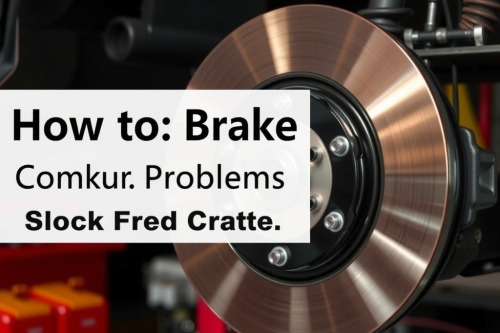
Brake system failures account for severe workshop liability and immediate roadside hazards if ignored. After diagnosing hundreds of hydraulic and friction assemblies on commercial and passenger vehicles, I've seen basic oversights ruin expensive hardware. Learning how to fix common brake problems requires isolating mechanical friction issues from hydraulic pressure losses before unbolting components. Grab your digital caliper and pressure gauges to start systematic troubleshooting.
Diagnose and Fix Common Brake Problems in Hydraulic Circuits
Air inside hydraulic lines ruins pedal response instantly. When atmospheric air enters past an aged caliper seal or during unpressurized fluid changes, the pedal compresses gas instead of transferring hydraulic force to the pistons. This condition leads directly to a spongy brake pedal repair scenario that demands rapid intervention.
Isolating Spongy Pedal Symptoms
Depress the brake pedal with the engine off until vacuum assistance dissipates. The pedal must stop solid after 25mm to 35mm of travel. If the pedal sinks steadily toward the floorpan under constant 20kg foot pressure, the internal primary piston seal inside the master cylinder is bypassing fluid. Replace the master cylinder assembly entirely rather than rebuilding it on high-mileage chassis.
Bleeding Hydraulic Brake Lines Under Pressure
Manual two-person bleeding often pulls air past loose bleeder threads. I use a pneumatic pressure bleeder set strictly between 1.0 bar and 1.4 bar to flush stale fluid. Begin at the caliper furthest from the master cylinder, typically the right rear corner on left-hand drive layouts. Drain at least 200ml of fluid per caliper until zero micro-bubbles exit the transparent waste hose.
Worn Brake Pad Replacement and Rotor Servicing
Friction material degradation remains the most frequent reason vehicles enter my service bays. Drivers routinely ignore acoustic wear clips until steel backing plates grind directly into cast-iron friction rings, generating localized temperatures exceeding 450°C.
Evaluating Pad Thickness and Discard Thresholds
Measure pad lining thickness across both inboard and outboard pads using digital vernier calipers. New friction linings typically deliver 10mm to 12mm of usable compound. Any friction pad displaying less than 3mm of remaining material requires immediate renewal. When inboard pads wear twice as fast as outboard pads, slide pins are seized or caliper piston boots are torn.
Conducting Brake Rotor Runout Inspection
Lateral runout creates rhythmic steering flutter under moderate deceleration from 80km/h. Mount a precision dial indicator to the steering knuckle with its contact probe set 10mm inward from the rotor edge. Rotate the hub by hand through 360 degrees. If indicated runout exceeds 0.05mm, clean the hub mounting flange thoroughly with a wire brush. Re-torque the rotor using conical washers to 40Nm and re-measure before deciding to machine or discard the disc.
Resolving Sticking Calipers and Uneven Drag
Caliper binding robs fuel economy and overheats wheel bearings. You'll identify this issue by an acrid smell and excessive brake dust concentrated on one single wheel hub after a 10km test drive.
Caliper Slide Pin Lubrication Procedures
Remove the guide pins and scrape dried, oxidized grease out of the bracket bores using a round wire brush and brake cleaner. Petroleum-based greases swell rubber dust boots, causing the pins to lock up solid. Apply a thin coating of high-temperature pure silicone paste or polyalphaolefin-based synthetic grease rated to at least 260°C. Tighten slide pin guide bolts between 28Nm and 38Nm according to manufacturer service manuals.
Piston Retraction and Seal Assessment
Use a mechanical piston compressor tool to drive pistons back into their bores. A healthy single-piston floating caliper retracts smoothly under moderate hand pressure. If retraction requires excessive torque, hydraulic corrosion has compromised the bore. Discard seized aluminum calipers immediately because honing them removes protective anodized coatings.
Eliminating Squeal, Chatter, and Low-Speed Brake Noise
High-frequency brake squeal occurs within the 1kHz to 5kHz frequency band. This sound is caused by friction excitation resonating through the caliper bracket rather than defective friction formulas.
Fitting Anti-Rattle Hardware and Backing Shims
Always replace stamped stainless steel abutment clips whenever you fit new friction pads. Never reuse old, heat-cycled clips that have lost their spring tension. Clean clip seats on the bracket down to bare metal with a file to remove rust scale. Apply a micro-layer of ceramic paste between the pad backing plate and the multi-layer shim, keeping all lubricants strictly away from the friction face.
Executing a Controlled Pad Bed-In Cycle
Proper bed-in deposits an even transfer layer of pad compound across the rotor surface. Accelerate the vehicle to 60km/h, then brake firmly down to 15km/h using about 60% pedal effort. Repeat this sequence 8 to 10 times consecutively without bringing the vehicle to a dead stop. Park the vehicle and allow the friction hardware to cool down completely for 30 minutes to lock the thermal layer.
Best Practices to Fix Common Brake Problems in the Bay
Executing clean mechanical work ensures high reliability and eliminates comebacks. Never leave a hanging caliper supported by its flexible rubber brake hose. Use heavy wire hooks to tether the caliper assembly securely to the coil spring to prevent internal hose cord rupture. Clean every wheel hub mating surface with an abrasive disc until you reveal raw steel; 0.02mm of rust buildup between hub and rotor magnifies into noticeable pedal pulsation within 3,000km.
Tighten wheel lug nuts with a calibrated torque wrench in a crisscross star sequence, setting passenger cars between 110Nm and 130Nm and light commercial trucks to 160Nm. Pneumatic impact wrenches warp rotor hats instantly through uneven clamp loads. To successfully fix common brake problems on customer vehicles, verify line pressure, check torque values against technical manuals, and road test every repair before release.