
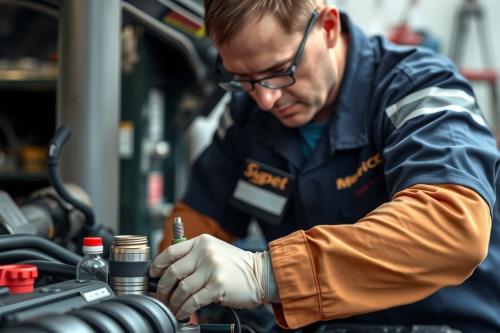
Twenty years of busting knuckles on dirty shop floors taught me that fuel issues fool even seasoned mechanics. A rough idle or extended crank often masks failing pumps, clogged filters, or gummed-up pintles. You need a systematic process to fix common fuel system problems before wasting hours of billable bay time. Grab your test gear, hook up your equipment, and let's isolate the real failure points right now.
Baseline diagnostics to fix common fuel system problems
Never throw parts at a car blindly. When a customer rolls in complaining of stalling under load or hard starting, park your rolling cart by the fender and plug in a capable OBD2 scanner. Check freeze frame data first. Look closely at both short-term fuel trim (STFT) and long-term fuel trim (LTFT) values.
Total fuel trim numbers exceeding positive 10% show an engine starving for petrol. Lean fuel trim codes like P0171 and P0174 often trigger when the engine control unit compensates for low line pressure or restricted delivery. Confirm whether fuel trims correct themselves at 2500 RPM. If trim numbers drop back to normal under load, suspect a vacuum leak instead. If trims climb past positive 20% at wide-open throttle, you face a genuine fuel starvation issue.
Accurate fuel pressure and volume verification
Diagnostic computers show target values, but mechanical gauges reveal cold reality. High-pressure pumps and low-pressure lift pumps operate under precise mechanical tolerances. Connect a mechanical fuel pressure gauge to the fuel rail Schrader valve before pulling any major components.
Turn the ignition important forward to prime the circuit. Port fuel injection systems typically demand 40 psi to 60 psi to atomize fuel cleanly. Gasoline direct injection (GDI) low-pressure feed lines must supply roughly 5 bar to the engine-mounted cam-driven pump. Watch the gauge needle closely during rapid throttle snaps. If line pressure dips more than 5 psi during acceleration, you have a volume delivery bottleneck.
Performing the critical volume flow test
Pressure without volume means nothing. A partially restricted filter can build 50 psi static pressure yet fail under real driving conditions. Route the gauge bleed hose into a graduated container. Jump the fuel pump relay manually for exactly 15 seconds. A healthy pump delivers at least 1 pint of fuel within 15 seconds, equaling 1 quart every 30 seconds. Replace the in-line filter or in-tank strainer if the flow falls below this baseline specification.
Fuel pump circuit testing and electrical verification
Pump failure isn't always mechanical. Every flat-rate tech knows that electrical dropouts masquerade as dead pumps. Avoid falling down an expensive diagnostic rabbit hole by verifying the power feed and chassis ground under actual working load.
Disconnect the electrical connector at the tank hat or access cover under the rear seat. Back-probe the harness connector pins with a digital multimeter while commanding the pump on. Supply voltage must measure within 0.5 volts of resting battery voltage, usually hovering around 12.6 volts. High electrical resistance on the ground side causes rapid pump motor burnout. Check voltage drop across the ground pin back to the battery negative terminal; anything higher than 0.2 volts mandates cleaning chassis ground lugs immediately.
Isolating clogged fuel injector symptoms and dirty rails
Modern ethanol-blended fuels break down quickly, leaving sticky varnish on injector tips and internal pintles. Recognizing clogged fuel injector symptoms saves you from misdiagnosing mechanical valvetrain problems. Typical signs include single-cylinder misfires under cruising loads, uneven tailpipe pulses, and prolonged engine cranking times.
Perform an automated injector balance test using your OBD2 scanner. This test pulses individual injectors for a predetermined duration while recording pressure drop. Each injector should trigger an identical pressure drop across the rail, typically within 2 psi to 3 psi of its neighbors. Any injector showing a drop lower than 1.5 psi suffers from internal restriction. Pull the rail, back-flush the internal screens with solvent, or run a dedicated pressurized canister cleaning setup directly into the rail at 45 psi.
Field tips to fix common fuel system problems and secure repairs
Finishing the repair requires thorough quality control. Always drop the fuel tank to flush out road sediment and rust scale whenever you drop in a new fuel pump assembly. Putting a fresh pump into a dirty tank destroys the new motor within 500 miles. Clean the tank interior thoroughly with lint-free shop rags before seating the new locking ring.
Double-check fuel line quick-connect clips for positive engagement. Pull back firmly on every push-connect line until you hear the distinct locking snap. A loose high-pressure fitting can trigger catastrophic engine bay fires within seconds of startup. Reset learned fuel adaptives with your scanner and run the vehicle through a complete drive cycle at variable speeds. Verifying trims return between negative 5% and positive 5% guarantees solid repair quality while preventing comebacks.
Mastering fuel delivery diagnosis
Executing clean repairs demands disciplined troubleshooting rather than uneducated guessing. Start with fuel trim data, confirm static pressure, verify delivery volume, and load-test electrical circuits before replacing expensive parts. Following these mechanical checks gives you the competence to fix common fuel system problems efficiently in your own bay. Grab your pressure test kit, verify supply voltage under load, and put these practical diagnostic steps to work on your next job.