
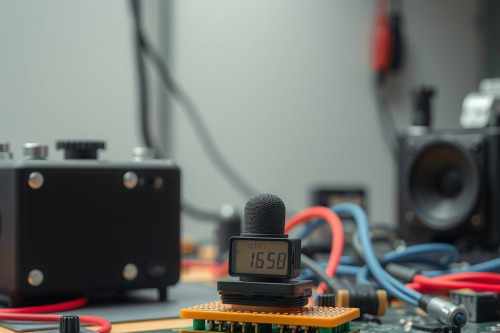
A silent access control unit or automation interface creates severe operational bottlenecks and frustrates end users immediately. During my years inspecting field installations, I have seen technicians replace entire motherboards simply because voice guidance stops working unexpectedly. Most audio failures stem from basic connection faults, dirt accumulation, or blown micro-transducers rather than total processor failure. You can isolate and solve these acoustic faults using basic diagnostic tools in under 15 minutes.
Primary symptoms when voice guidance stops working
Field units communicate operational statuses, alarm triggers, and configuration prompts through synthetic voice prompts. When audio output cuts out, users can't confirm whether a transaction succeeded or failed.
Look for three distinct failure modes. The unit may operate in complete silence while display elements remain functional. Alternatively, you might hear faint clicking or severe distortion before the output cuts out completely. In intermittent cases, audio works only at high operating temperatures or drops when relay coils engage.
Pinpointing the exact symptom isolates whether the failure originates in the digital control logic, the power rail, or the physical acoustic output stage.
Physical hardware checks for speaker units
Physical transducers endure continuous vibration, thermal cycles, and environmental contamination. Start your inspection by disassembling the outer shell to access the micro-speaker assembly.
Inspect the speaker cone for physical tears, metal dust, and moisture ingress. Small 8 ohm speakers found in commercial terminals feature a delicate transducer diaphragm damage easily caused by over-voltage spikes or foreign debris. If iron filings cling to the internal permanent magnet, clean the chamber immediately using dry compressed air at 2 bar.
Verify electrical continuity across the speaker terminals using a multimeter set to resistance mode. A healthy voice coil should read between 4 ohm and 16 ohm depending on unit specifications. An infinite resistance reading confirms an open-circuit voice coil that requires an immediate component swap. A reading near 0 ohm indicates a dead short across the coil windings. Replace any speaker exhibiting out-of-spec coil resistance immediately.
Tracing audio codec circuit fault and signal lines
If the speaker coil passes continuity checks, focus your attention on the drive electronics. Audio signals originate from an onboard digital processor before feeding into an amplifier chip.
Inspect the circuit traces leading from the amplifier output pins to the speaker wire harness. Corroded solder joints, cracked surface-mount pads, and loose 2-pin JST connectors cause frequent signal drops. Measure the DC voltage across the amplifier power pins while triggering a voice alert. A typical class-D amplifier module requires a steady 3.3V or 5V DC supply rail to operate correctly. If the voltage drops below 2.7V under load, your power supply filter capacitors have degraded.
Look for scorched silicon packages indicating an audio codec circuit fault. When the digital-to-analog converter or amplifier IC overheats, thermal shutdown mechanisms trigger immediately. Replace defective surface-mount capacitors and verify that output filtering inductors haven't desoldered under heavy load cycles.
Resolving software glitches and firmware audio driver crash
Hardware doesn't always cause audio failure. Corrupted firmware partitions and misconfigured registers mute audio chips without causing physical component damage.
Check the terminal configuration menu or management software before unmounting hardware. Verify that system volume sits above 0% and verify that prompt files reside in their designated flash memory sectors. We often see a volume potentiometer failure or digital register wipe reset output levels to mute after emergency power outages.
Reboot the system into safe diagnostic mode. Re-flash the system firmware if you suspect a firmware audio driver crash corrupted the digital sound tables. When firmware updates fail to restore speech synthesized prompts, execute a hardware factory reset by bridging the designated PCB pads for 10 seconds. This step clears stuck register flags inside the microcontroller audio buffer.
Bench testing and embedded speaker diagnostics
Advanced field diagnosis requires controlled bench testing with isolated signal injection. Remove the control board from the field enclosure and set it on an anti-static mat.
Apply a regulated 12V DC power supply to the main board terminals. Connect an external 8 ohm 0.5W test speaker to the audio output pins to bypass installed cabinet wiring. This step confirms whether the fault exists on the control board or within external cabinet harnesses. Run the onboard automated self-test protocol to execute embedded speaker diagnostics across all stored audio tracks.
If the test speaker produces clear tones, the fault lies entirely in external cabling or chassis grounding loops. Check wire pinch points along enclosure hinges and verify that cable shield braids ground securely to the chassis ground lug.
Bench repair decisions when voice guidance stops working
Technicians must balance component repair time against full hardware replacement costs. When voice guidance stops working across several field units, establish a standardized triage process.
If diagnostic testing points to a simple voice coil rupture or severed wire harness, replace the 15mm dynamic speaker unit. These replacement transducers cost under 3 USD and take 5 minutes of soldering work. However, if troubleshooting reveals multi-layer board burns, damaged BGA processors, or delaminated PCB layers, motherboard replacement is the only dependable path. Don't waste 3 hours attempting to rework miniature micro-controllers on aging access terminals.
Conclusion
Prompt resolution of acoustic faults keeps automated equipment functional and safe for operators. Systematic isolation of the speaker, amplifier, and firmware prevents unnecessary equipment replacements on site. Don't discard equipment when voice guidance stops working. Test the impedance, verify supply voltages, and restore audio communication efficiently. Contact our technical team today to source replacement components and obtain schematics for your hardware.