
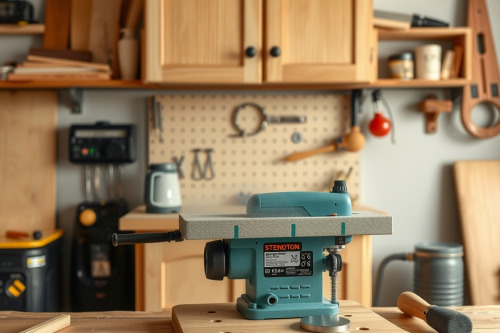
I see too many rookie woodworkers ruin reclaimed white oak doors by slamming a high-RPM cutter straight into aged, brittle end grain. When you tackle adding modern profiles to vintage cabinets, you face hidden nails, grain reversal, and stubborn aged finishes that shred carbide cutters. Dialing in feed speed, passes, and proper machine control saves hundred-year-old casework from the scrap bin. Here is the no-nonsense baseline every beginner needs before touching seasoned timber.

Inspecting stock before adding modern profiles to vintage cabinets
Vintage lumber behaves nothing like fresh kiln-dried dimensional stock from the local yard. You're cutting into dry, brittle timber with internal stresses that formed across 50 to 90 years of seasonal movement. Sweep every rail and stile with a handheld metal detector before spinning up your tooling. Hitting a buried 18-gauge brad nail destroys a 40-dollar cutter instantly and creates dangerous high-speed debris.
Check the moisture content across all door frames using a pin-style meter. You want readings between 7% and 9% before profiling. Brittle, petrified fibers require micro-passes to prevent severe tear-out at the corners. Always run test passes on scrap pieces from the same era to read how the grain shears.
Choosing the right wood router configuration
Don't attempt heavy casework profiling with a lightweight laminate trimmer. You need a dedicated wood router featuring a minimum motor rating of 2.25 horsepower and a variable speed dial. Any objective wood router review written by real carpenters stresses the value of electronic speed control under load. The tool must hold its RPM constant when the bit bites deep into dense antique cherry or heart pine.
A plunge base gives / includes versatility, but a heavy cast-iron router table provides the safest platform for smaller cabinet doors. If you must run hand passes on assembled face frames, clamp oversized guide fences directly to the workpiece. Choosing the best wood router base comes down to stability against the edge; tipping mid-pass ruins the entire molding line.
Tooling up and controlling profile depth
Never rely on 0.25-inch shank bits for aggressive modern profiles like chamfers or steep bevels. Step up to 0.5-inch shanks every single time. Thin shanks flex under lateral load, leading to visible bit chatter that leaves washboard ripples along your finished profile.
Setting up incremental passes
Never hog out material to full depth on pass 1. Divide your target profile depth into 3 or 4 progressive milling steps. Take 2mm light passes and save a final 0.5mm whisper pass to clean the surface. Back off your cutting depth using stepped turret stops or micro-adjusting collars on the base.
Securing the collet
Thoroughly clean the motor spindle taper before seating your tooling. Dust buildup inside the collet causes collet slip, allowing the bit to creep downward during heavy operations. Push the shank fully down into the collet, then back it off 3mm to 4mm before tightening down the wrench firmly.
Milling passes for adding modern profiles to vintage cabinets
Milling sequence dictates whether your corners stay crisp or blow out completely. Always mill across the end grain first on the top and bottom rails. The fragile grain at the exit corner will blow out slightly. Running the long-grain stiles afterward cleanly shears away that damaged exit corner.
Maintain steady forward tool momentum across the cut. Pausing for even 1 second generates excessive friction, immediately burning the stock and glazing ancient resins. Feed the tool against the bit rotation from left to right on outside edges. When working on a table, lock a featherboard against the stock to hold the timber flat against the fence.
Managing machine stress, safety, and workspace dust
Old lacquer, varnish, and oxidized finishes generate gummy, hot waste that clogs tooling flutes fast. Connect a shop vacuum equipped with an automatic tool trigger to evacuate chips at the point of origin. A sudden dust collection choke leaves hot chips trapped around the spinning cutter, escalating fire risks on aged wood.
Protect your lungs and eyes on every pass. Run a certified respirator rated for fine silica and lead particulates when machining pre-1978 casework. Keep your hands at least 100mm away from the bit line and rely on heavy-grip push pads for feed pressure.
Final shop checks for modern casework upgrades
Examine the routed edges under raking light with a 500-lumen inspection torch to spot hidden chatter before laying down any topcoat. Sanding should only take 120-grit followed by 180-grit paper on a hard cork block to preserve the sharp modern geometry you just cut. Master the setup, control your feed speed, and tackle adding modern profiles to vintage cabinets with absolute precision on your next workshop restoration.