
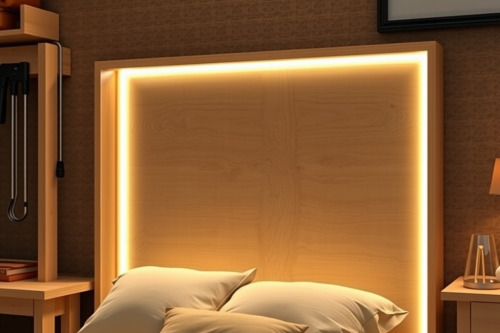
Tackling a custom headboard with integrated LED channels without planning your router passes invites rough edges, burned hardwoods, and ruined extrusions. Over 22 years of finish carpentry, I've seen too many solid cherry and walnut slabs destroyed by sloppy feed speeds. You need clean dadoes, precise clearances, and rigid guide fences to house lighting flush against raw lumber. Dialing in your machine right from the initial setup ensures sharp edges and zero workpiece ruin.
Essential gear for a custom headboard with integrated LED
Building bedroom fixtures requires stable machinery. You need an accurate wood router that holds its line without drifting off your track. A light trim motor handles shallow edge details, but cutting recessed raceways into 19mm white oak demands serious horsepower.
Plunge base versus fixed base
Choose your machine base according to entry needs. A plunge base lets you drop into internal slots smoothly without marring adjacent surfaces. Fixed bases excel at edge profiles where fence contact stays unbroken from end to end. When routing enclosed channels for lighting, plunging saves your layout lines from unnecessary entry ramps.
Collet sizing and shank diameter
Never compromise on your shank thickness. Run 12.7mm shanks whenever possible because 6.35mm shanks bend under lateral loads. Excessive flex causes severe bit chatter and ruins channel walls. Tighten the nut firmly with 2 matched wrenches to prevent collet slip midway through your run.
Selecting your wood router setup
Searching for the best wood router setup comes down to electronic feedback and base rigidity. A motor that bogs down under moderate loads will ruin your feed rhythm. When reading a wood router review, look closely at how the base handles vibration under continuous load.
Speed controls and power delivery
Variable speed dials keep your cutters within safe operating limits. Spin large diameter bits at 12000 RPM, but rev up small straight bits to 22000 RPM. If your tool lacks electronic speed management, the bit slows down inside dense grain. That friction will end up burning the stock and dulling carbide edges rapidly.
Tooling and bit selection for channel cutting
Grooving channels for metal profiles requires precise tooling. Standard aluminum LED channels measure 17.5mm wide and 8mm deep. You need cutters that clear chips instantly to prevent heat buildup inside enclosed slots.
Straight bits versus spiral upcut bits
Standard two-flute straight bits pack chips inside deep grooves. Solid carbide spiral upcut bits pull waste out of the groove effortlessly. This chip ejection prevents tear-out across cross-grain fibers. When cutting tight slots, use a rigid featherboard against your straightedge to hold the router base down.
Executing clean channels for a custom headboard with integrated LED
Never attempt to route full channel depth in a single pass. Hogging out 10mm of hardwood at once strains your motor and splinters expensive stock. Split your cuts into multiple progressive passes for clinical precision.
Setting accurate profile depth
Set your initial profile depth to 3mm for the scoring run. This shallow cut slices clean surface fibers without stressing the workpiece. Advance the depth stop by 3mm on subsequent passes until reaching your final 9mm bed. Test your aluminum channel fit repeatedly with mechanical calipers to make sure a snug friction fit.
Managing dust and feed rate
Keep your travel speed smooth, steady, and deliberate. Moving too slow chars hardwood, while pushing too fast creates jagged scalloped walls. Connect a dedicated 38mm hose to your dust port. Poor vacuum flow creates a sudden dust collection choke that blinds your vision and traps heat against the cutter.
Troubleshooting site mistakes on raw timber
Every carpenter runs into unpredictable wood grain behavior. Figured maple and interlocking grain can chatter or chip regardless of your prep work. Adjusting your mechanics at the bench solves these common flaws quickly.
Eliminating chatter and burn marks
Check your collet cleanliness if ridges appear on your cuts. Wood resin buildup inside collet grooves prevents even clamping force on the tool shank. Clean the cone with mineral spirits and a stiff wire brush. If burning occurs at stops, ramp out of the cut smoothly rather than lingering in one spot.
Final assembly and inspection checklist
Building a custom headboard with integrated LED components requires seamless alignment between millwork and electronics. Inspect your cut depth along the entire run with a dial depth gauge before breaking down your bench setup. Check that aluminum extrusions drop flush without sticking up above the wood face. Sand all channel shoulders with 180 grit paper to break sharp edges. Secure your lighting strips firmly, run your wiring through pre-drilled rear exit holes, and test your power supply before final mounting. Grab your router and begin your build today.