
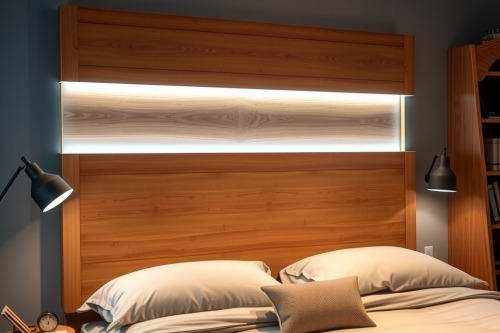
Routing wire raceways without butchering expensive hardwood requires proper setup and steady hands. Over 15 years on job sites, I've seen too many beginners scrap slabs by cutting channels in 1 reckless pass. Building a custom headboard with integrated LED accent lighting demands accurate tooling and clean execution. Setting up your wood router correctly eliminates sloppy tolerances before you drop a bit onto the workpiece.
Planning your custom headboard with integrated LED accent lighting
Begin with a scaled layout of your backer board. You need 19mm thick oak or walnut to maintain structural rigidity after hogging out channels. Mark your perimeter offset at 50mm from the outer edge. This offset hides the light source while casting an even glow against the bedroom wall.
Never mount bare tape directly onto raw timber. Solid lumber traps heat and degrades diodes within 6 months. Plan your grooves to house an anodized aluminum channel. The channel acts as a heat sink and provides a tight friction fit for the milky lens cover. Measure channel dimensions with a digital caliper before touching your lumber.
Selecting the best wood router for channel cuts
Plunge capabilities make or break this job. A fixed-base tool forces dangerous drop-in cuts that kick back and destroy edges. You need a plunge base with smooth column travel and a multi-step turret stop. Any objective wood router review will prioritize micro-adjustment dials over raw horsepower for precision joinery.
Look for a variable-speed motor rated between 1.25 and 2.25 horsepower. A compact model gives you maximum visibility along pencil lines. Larger 3.25 horsepower motors offer raw grunt, but their weight induces arm fatigue on long passes. For milling 12mm wide aluminum channels, the best wood router combines electronic speed control with a rigid base plate to eliminate bit deflection.
Milling wire channels for a custom headboard with integrated LED accent lighting
Tackle the channel in 3 shallow passes rather than 1 heavy hogging cut. Plunge 4mm deep on the 1st run, advance another 4mm on the 2nd, and finish at your final profile depth of 12mm. Heavy passes cause severe bit chatter that leaves jagged channel walls. Use a solid carbide 2-flute upcut spiral bit to eject chips cleanly out of the trench.
Keep your travel speed uniform across the entire length of the timber. Pausing mid-cut leads to burning the stock instantly. Secure a straight edge clamp 75mm parallel to your cut line. Check your collet before hitting the power trigger. Debris inside the cone causes collet slip, dropping the cutter deeper than intended and ruining the rear face.
Managing router dust and preventing workpiece tear-out
Deep blind grooves generate packed sawdust fast. If chips pack the flute, you trigger sudden tear-out along brittle end grain. Hook a dedicated 36mm vacuum hose straight to the plunge hood. Weak extraction creates a dust collection choke, blinding your line of sight and superheating the carbide.
Score your start and stop marks with a marking knife before routing. Severing surface fibers stops grain lifting when the bit enters the cut. Push the base firmly down with your left hand while guiding forward motion with your right. Maintain steady forward feed against bit rotation to prevent climbing cuts.
Hardware mounting and clean wire integration
Bore a 25mm access hole through the backer panel for your low-voltage feeder wires. Keep high-voltage 120V power converters away from bedding materials by mounting the driver in a vented box behind the headboard base. Run 18 AWG 2-conductor wire through your routed channels directly to the LED strip pads.
Solder connections instead of relying on cheap snap-on terminal clips. Snap-on connectors fail when the headboard shifts against wall studs. Lay the strip flat, peel the adhesive backing, and press it firmly into the aluminum track. Snap the frosted diffuser lens in place to blend individual hotspots into continuous light.
Job site deployment and testing your custom headboard with integrated LED accent lighting
Inspect the finished assembly before securing it to the wall framing. Test your low-voltage lines with a multi-meter to confirm 24V delivery with zero voltage drop. Check that the aluminum track sits completely flush across every routed channel. When building a custom headboard with integrated LED accent lighting, take time to true up your straight edge guides and clamp setups. Set your plunge depth stops carefully on scrap stock, mount your brackets securely into wall studs, and fire up the system.