
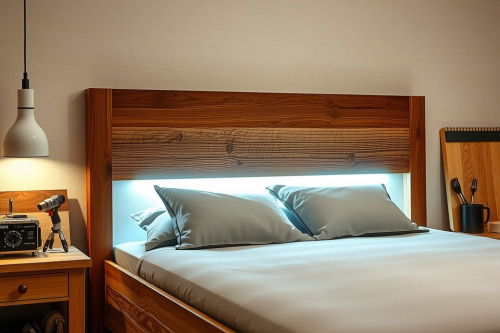
Nothing ruins finished oak faster than an aggressive plunge cutting a channel off-track. Over 20 years on job sites, I have repaired countless botched panels where guys rushed into building a custom headboard with integrated LED lighting without proper fixturing. Routing deep, narrow channels for flush diffusers demands rigid fence setups and calibrated feed rates. Dial in your tooling right now to prevent expensive lumber from ending up in the scrap bin.
Choosing the best wood router for LED channel joinery
Cutting precise extrusion channels requires zero motor deflection. You need a dedicated plunge base that locks tight without tilting under hand pressure. A 2.25-horsepower mid-sized wood router delivers ample torque without the ungainly top-heaviness of a 3.25-horsepower beast. Solid variable speed control keeps your bit turning at 18000 RPM to prevent surface friction burns. If you read any credible wood router review, spindle concentricity consistently separates real production tools from throwaway DIY equipment.
Collet selection and runout risks
Never rely on cheap 6.35mm shank bits for long uninterrupted linear passes. Always secure your bits inside an accurate 12.7mm collet. Slender shafts deflect under side loads. That flex introduces violent bit chatter into the groove wall. Inspect the collet cone before tightening. Pitch buildup inside the sleeve causes catastrophic collet slip mid-cut, sending your groove depth wandering completely out of spec.
Setting up guide rails for a custom headboard with integrated LED lighting
Don't attempt freehand routing on a high-value piece of hardwood paneling. Clamp a verified straight edge guide securely across your substrate. Check both ends with a mechanical dial caliper. Secure clamping prevents fence drift during heavy passes.
Account for the exact baseplate offset before you drop the tool into wood. The distance from the bit perimeter to the flat base rim must be identical across both setup points. Clamp backer blocks against the entry and exit edges of the panel. These sacrificial blocks back up the wood grain directly. They stop ugly tear-out when the cutter breaks through outer borders.
Dialing in profile depth and feed rate to eliminate tear-out
Take multiple shallow passes rather than hogging out full dados at once. Plunging straight to a 15mm depth in dense maple overloads the motor immediately. Set your initial profile depth to 5mm. Clean the debris out, then advance your depth stop rod by 5mm increments. This tiered removal keeps cut walls crisp and square.
Feed rate governs the quality of your finished slot. Pushing too slow generates destructive friction. You end up burning the stock and dulling your carbide cutters prematurely. Moving too fast rips jagged splinters along the grain boundary. Maintain a continuous, firm push against bit rotation at roughly 3 meters per minute.
Milling channels for a custom headboard with integrated LED lighting
An aluminum LED channel requires an interference fit to seat flat without sagging. Cut your channel 0.5mm wider than the extrusion casing. This clearance accommodates slight dimensional changes caused by ambient humidity swings. Test your profile depth using a 100mm cut-off block before touching master slabs.
Managing concealed wire management pathways
Bore 12mm pass-through holes at the end of each dado run. Chamfer the rear edges of those holes with a 45-degree chamfer bit. Sharp timber shoulders slice low-voltage lead insulation during assembly. Route secondary rear chases to house concealed wire management trunks cleanly away from mounting studs. Pack the channels tight and verify that every flush diffuser lens sits 0.5mm below the finished face.
Dust control and power wire routing in the shop
Enclosed routing creates enormous piles of chips that blind your layout lines. Use a high-cfm shop vacuum coupled directly to the router base shroud. A restricted vacuum port triggers an immediate dust collection choke, packing chips inside the cutting cavity. Packed swarf heats the cutter tip to over 300 degrees Celsius and destroys edge temper.
Run a dedicated static-dissipative 38mm hose suspended from an overhead boom. This setup clears your fence path and stops line snags. Empty the collector drum before beginning lengthy dados. Unrestricted airflow keeps the motor housing running cool across continuous milling sessions.
Field deployment and final assembly inspection
Check the bare channel floor with a 150mm precision steel rule before applying adhesives. Any hump pushes the aluminum strip outward and ruins diffuser alignment. Wipe the raw timber channels with denatured alcohol to lift residual dust. Lay down neutral-cure structural silicone beads at 150mm intervals. Press the metal extrusion firmly into the slot with a hard rubber J-roller.
Execute this process methodically to craft an exceptional custom headboard with integrated LED lighting that never fails on site. Match the best wood router to your specific shop space, true your straightedges, and cut your dados cleanly.