
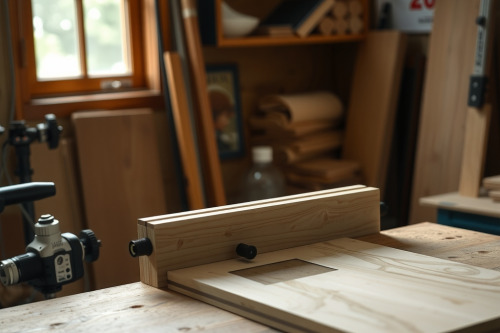
Running 200 identical contoured stretchers across a router table will expose every single flaw in your tooling. I learned years ago that double-sided tape and scrap fences invite disaster on high-volume runs. Constructing a heavy-duty dedicated template routing jig transforms an erratic, dangerous profiling task into a clean, repeatable machining operation. You eliminate dimensional drift, protect your hands, and push accurate components through the shop without losing your margin.
Anatomy of a dedicated template routing jig
A mass-production jig must withstand hundreds of clamp cycles without flexing. If your substrate yields under downward pressure, your profile depth wanders immediately. Use 18mm compact phenolic sheet or high-density Baltic birch plywood for the carrier sled. Substrates thinner than 15mm buckle under clamping loads, inducing vibration into the workpiece.
Baseplate rigidity and reference edges
Machine your reference pattern from 12mm cast acrylic or balanced phenolic. Don't use standard MDF; the bearing will eventually compress the edges under continuous friction. True up the master template edge with 220-grit abrasive on an aluminum sanding beam. Verify squareness with a calibrated dial indicator mounted to your table slot before putting the jig into regular service.
Workholding and toggle geometry
Friction pads made from 1.5mm textured neoprene prevent lateral shift without marring the stock. Mount at least 2 heavy-duty push-pull toggle clamps to lock the raw blank against rigid indexing fences. Space the toggle clamps no more than 150mm apart to isolate the cut path from severe lateral deflection.
Selecting your wood router and tooling setup
You need torque, balanced collets, and clean electronics. When selecting the best wood router for fixed-table jig work, look strictly at continuous duty ratings rather than advertised peak horsepower. A motor drawing 15 amps with electronic speed control maintains consistent spindle RPM under sudden grain changes, preventing stalling mid-cut.
Spindle requirements and collet integrity
Never run 6.35mm shanks on heavy template cuts. The radial loads generate aggressive bit chatter that destroys edge quality and ruins your bearings. Install a solid 12.7mm solid carbide spiral compression bit into an ultra-precision collet cone. Thoroughly degrease the shank and collet bore with solvent before torquing to specification; oil residue leads directly to collet slip and catastrophic tool climb.
Feed speed and speed settings
Set your speed dial based on bit diameter and wood species. A 50mm diameter pattern bit spinning above 16000 RPM creates excessive heat against hard maple, promptly burning the stock and glazing the cutter carbide. Slow the spindle down to roughly 14000 RPM, maintain a steady feed rate, and let the cutter clear the waste cleanly.
Mitigating bit chatter and dust collection choke
Vibration kills edge quality faster than dull carbide. If your jig lacks mass, high-speed harmonic resonance transfers directly into the workpiece, leaving visible washboard rippling along the routed edge. Build mass directly into your sled base and keep your work overhang under 6mm from the clamp line.
Evacuation airflow dynamics
Mass production creates mounds of chips in seconds. Enclose the underside of your table and secure an overhead collection hood directly over the cutter path. Inadequate airflow leads to a severe dust collection choke, packing coarse chips between your bearing and template. That buildup forces the bit away from the pattern, wrecking your dimensional accuracy.
Climb routing risks versus conventional passes
Never attempt full-depth climb cuts on a heavy jig without mechanical stops. While a light 0.5mm climb pass cleans up fuzzy grain, an aggressive climb cut can snatch the entire jig out of your grip. Hog out the bulk of the waste with conventional feeding, leaving just 1mm of material for the final cleanup pass.
Tuning a dedicated template routing jig for zero tear-out
Tear-out ruins expensive hardwood parts instantly. You defeat grain tear by controlling chip thickness and backing up the cut exit. Incorporate sacrificial phenolic backer blocks directly into your jig frame wherever the cutter exits the end-grain profile.
Compression tooling advantages
Run compression spiral bits for veneered sheets or tricky figured woods. An up-cut spiral base pulls chips upward from the bottom face, while the down-cut upper flute shears downward against the top surface. This opposing shear geometry keeps both faces crisp and prevents edge splintering on delicate hardwoods.
Step-down cutting sequences
Don't plow through 38mm solid stock in a single pass. Set up multiple routing stations or utilize stepped guide bearings to machine the profile across 2 distinct depth increments. Splitting the chip load preserves cutting edges and prevents thermal breakdown of your cutter carbide.
Shop maintenance and continuous inspection protocols
Check the fasteners on your dedicated template routing jig every 50 parts. Machine vibrations slowly back out machine screws, shifting your stop blocks by fractions of a millimeter. Apply medium-strength thread-locking fluid to all clamp base hardware and stop-block anchor threads.
Inspect your guide bearings daily for resin accumulation and axial play. Wipe the bearing race with mineral spirits and verify that it spins freely without grinding. If you hear bearing hiss or detect play, replace the bearing assembly immediately to prevent scoring your master template.
Any comprehensive wood router review will confirm that machine power means nothing without rigid workholding. Build your dedicated template routing jig with substantial materials, clamp your blanks tight, and dial in clean dust collection. Pull your template stock out of storage, inspect your router collets, and build your production jig to tighter standards before your next high-volume run hits the floor.