
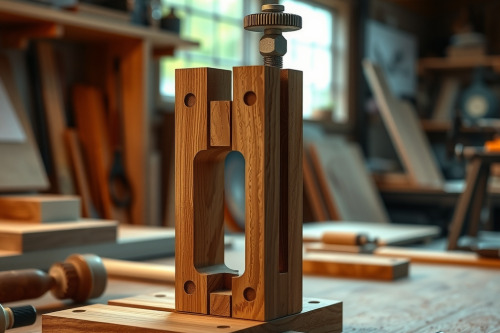
Sloppy fingers and loose joints ruin fine cabinetry faster than cheap lumber. Over 25 years on the bench, I've seen too many projects scrapped because a flimsy guide fence yielded unacceptable slop. Constructing a dedicated box-joint jig for precision wood crafting eliminates cumulative spacing error at the router table. Build it rigid once, and your corner joinery will lock together off the tool with zero hand-planing required.
Base Platform and Runner Geometry for the Jig
You need stable stock for the sub-fence and base. Skip standard construction plywood because internal voids destroy dimensional stability under seasonal humidity changes. Mill a slab of 19mm Baltic birch or solid phenolic plate to 450mm by 200mm. True the face flat on a jointer. Check both edges for dead-square alignment with your cast-iron top.
A dead-square miter gauge runner forms the foundation of every cut. Steel or brass runner stock beats hardwood bars every time. Mount the runner into your table slot using 0.05mm brass shims to remove side-to-side play. Slide the base back and forth across the table. It must glide smoothly without binding or rocking. Any lateral play at this stage translates directly into uneven finger widths on your finished workpieces.
Calibrating the Key for a Box-Joint Jig for Precision Wood Crafting
Accuracy hinges on your indexing pin. If your important drifts by even 0.1mm, that gap multiplies across 10 consecutive fingers. Machine a solid brass indexing pin rather than relying on soft pine offcuts. Brass resists compressive wear when clamping workpieces repeatedly against the stop. Cut the pin to match your exact bit diameter of 12.7mm or 6.35mm.
Mill the primary slot through the sub-fence using the identical cutter mounted in your router. Drive the fence past the bit at low feed speed to prevent tear-out on the rear face. Press the brass pin into this kerf with a light press-fit. Measure the distance from the pin to the cutter edge using a dial caliper. That gap must equal the pin width down to 0.02mm. Lock the micro-adjust carriage down with two 6mm machine bolts into threaded brass inserts.
Router Bit Selection and Mitigating Bit Chatter and Tear-Out
Never run cheap high-speed steel slotting cutters for end-grain joinery. Solid carbide spiral upcut bits clear waste efficiently while pulling fibers upward against a sacrificial backer board. Straight two-flute cutters often produce violent bit chatter in dense hardwoods like white oak, leaving washboard marks on joint shoulders.
Match the motor output to the task. Even the best wood router will bog down if you shove 19mm dense maple through a 12.7mm cutter in a single pass. Take the cut in 2 progressive passes by setting your final profile depth with a dedicated brass setup bar. A high-grade wood router review often highlights soft-start speed controllers, but your ears tell the true story under load. Keep motor speeds between 16000 RPM and 18000 RPM for 12.7mm shank bits to avoid burning the stock while maintaining clean finger joint cuts.
Operating Procedure for Clean Finger Joint Cuts
Joint quality drops when workpieces wander during the stroke. Clamp your board dead vertical against the sub-fence using 2 heavy-duty toggle clamps. Hand pressure alone can't resist the rotational torque of a 3-horsepower wood router spinning at full load.
First Pin Registration
Index your first board flush against the brass pin. Keep the reference face oriented toward the jig face. Feed the carriage slowly across the cutter at a steady 25mm per second rate. Retract the jig completely before unhooking the workpiece to prevent back-cutting and edge splintering.
Mating Board Offset
Position the second board using a spacer block identical in width to your cutter. Clamp both boards together if your bit height allows. This technique ensures absolute shoulder alignment across mating drawer sides. Clean the table surface between passes. Trapped chips create a dust collection choke that lifts the base, causing out-of-square cuts.
Diagnosing Collet Slip, Burning, and Mechanical Deflection
Inspect the cut faces under raking shop light after running your first joint test. Black glaze on the end grain indicates dull tooling, excessive dwell time, or incorrect feed rates. When cutter marks vary between fingers, examine your tool arbor. A dirty collet causes collet slip, allowing the bit to drop downward during heavy plunge cuts.
Clean router collets with mineral spirits and a brass wire brush every 20 run-hours. Throw away worn collet cones showing internal scorings. Deflection also stems from loose fence mounts. Tighten your locking hardware firmly with wrench flats rather than plastic thumb knobs that vibrate loose during production runs.
Deploying the Box-Joint Jig for Precision Wood Crafting in the Shop
Inspect every component of your box-joint jig for precision wood crafting before starting production cabinetry. Mount your dial gauge, run the sled along the full stroke, and verify zero needle jump against the table slot. Replace sacrificial tear-out backer strips as soon as cutter slots blow out wider than 0.5mm. Drop this jig onto your router table, run a quick hardwood test scrap, and dial in your tolerances before cutting your prime project stock.