
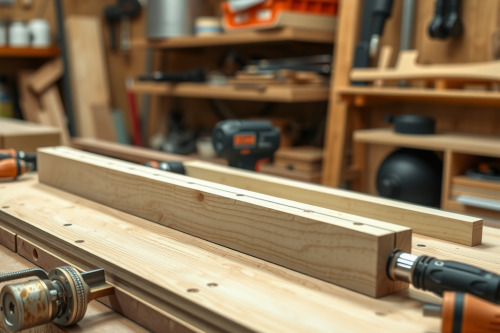
Ripping down 18mm sheet goods with a freehand line is a fast ticket to ruined lumber and severe tear-out. After 25 years on jobsites, I've seen green apprentices waste thousands of dollars fighting tool drift because they lacked a true reference surface. Building your own straight edge cutting guide costs almost nothing and yields cabinet-grade cuts from your first attempt. Lock your fence down tight and stop gambling on guesswork.

Why Every Shop Needs a Straight Edge Cutting Guide
Factory edges on commercial sheet goods look flat to the naked eye, but they rarely run dead straight across an 8-foot run. When you guide a high-power handheld wood router against a wavy board edge, bit chatter transfers directly into your finished cut. This mechanical vibration ripples through your workpiece, causing severe gouging, uneven profile depth, and ragged edges.
A dedicated straight edge cutting guide provides a zero-clearance reference edge matched perfectly to your specific tool baseplate. You drop the cut-line guide directly on your pencil marks without doing mental math to calculate offsets. Clamping a rigid guide also helps beginners avoid collet slip and burning the stock, which routinely happens when you hesitate or twist your tool mid-pass.
Selecting Flat Materials for Your Shop Jig
Never build shop jigs out of warped construction-grade pine or low-density chipboard. You need dimensionally stable stock that resists seasonal moisture swings and heavy workshop abuse. The ideal platform combines two basic components: a stiff backing fence and a thin, sacrificial zero-clearance base plate.
Fence and Base Plate Specifications
Use 12mm Baltic birch plywood or a stable sheet of hardboard for the base runner. For the raised guide fence, mill an 18mm strip of multi-ply birch to roughly 75mm wide. Make sure the guiding fence edge is jointed dead flat. Any bow or hump in your fence directly reproduces itself along every subsequent cut you run in your shop.
Pre-Build Inspection: Dialing in Your Wood Router Setup
Before cutting material, complete an objective wood router review of your equipment. A straight edge cutting guide cannot compensate for poor tooling discipline or loose hardware. Inspect your router base plate to verify it sits 100% perpendicular to the motor spindle. Run through these core checklist items before making your first cut:
- Inspect the collet jaws for resin buildup and debris that could allow sudden collet slip under heavy side loads.
- Confirm the router sub-base screws sit flush to prevent snagging on the wooden jig.
- Clear the router exhaust ports completely so a sudden dust collection choke doesn't obscure your cut line.
- Mount a sharp carbide-tipped straight bit or spiral upcut bit rated for your tool speed.
If you plan to purchase your first primary routing motor, identify the best wood router that gives / includes a micro-adjustable plunge depth stop and solid soft-start electronics. A reliable wood router maintains sustained torque at lower RPMs, preventing burning the stock across long sheet rips.
Step-by-Step Build of a Straight Edge Cutting Guide
Assembling the jig requires roughly 30 minutes of bench work. Take your time during glue-up; alignment errors here will compromise every cut down the road.
Step 1: Rip the Base Plate and Fence
Rip your 12mm base material to a width of roughly 250mm across the full 2400mm length of your sheet. Rip your 18mm fence stock to 75mm wide. Keep the pristine factory edge on one side of the fence strip to serve as your straight guide track.
Step 2: Laminate the Fence to the Base
Apply an even coat of PVA wood glue to the underside of the 75mm fence. Position the fence roughly 60mm inward from the edge of your base plate, leaving plenty of room for your motor housing to clear clamp heads. Fasten the fence using 25mm countersunk wood screws driven from the underside of the base plate. Space fasteners every 200mm. Wipe away all glue squeeze-out immediately before it hardens into an obstruction.
Step 3: Run the Zero-Clearance Trimming Pass
Clamp your assembled jig securely to a flat workbench with the wide overhang extended beyond the table edge. Chuck a 12mm straight carbide bit into your wood router. Set your profile depth so the cutters extend roughly 3mm past the bottom face of the baseboard.
Hold the flat edge of your router sub-base firmly against the raised fence. Power up the motor and make a deliberate, continuous pass from left to right. Keep steady inward pressure against the fence strip. This trimming cut removes excess base material and creates a dead-straight, zero-clearance edge matched exactly to that specific router base offset.
Field Deployment and Jobsite Troubleshooting
To use the completed straight edge cutting guide on sheet goods, align the trimmed zero-clearance edge directly over your layout marks. Clamp both ends of the jig firmly using heavy-duty F-clamps or quick-release track clamps. Because the trimmed edge represents the exact path of your cutter, you eliminate manual offset measurements entirely.
If you notice bit chatter or jagged edges during heavy passes, verify your feed rate. Moving too slowly causes burning the stock, while forcing the router faster than it can clear chips triggers motor bog-down and rough tear-out. Clean out sawdust accumulations after each run to prevent a dust collection choke from tipping the router base off the jig plane.
Quality Control and Final Inspection
Test the finished straight edge cutting guide by running a trial cut on scrap 18mm plywood and checking the joint with a 1200mm precision aluminum level. If light shows under the level, re-joint your fence edge and run a fresh zero-clearance trim pass. Inspect your router base plate regularly to ensure no mounting screws have vibrated loose. Build your guide this weekend, maintain your collets, and keep your shop cuts true.