
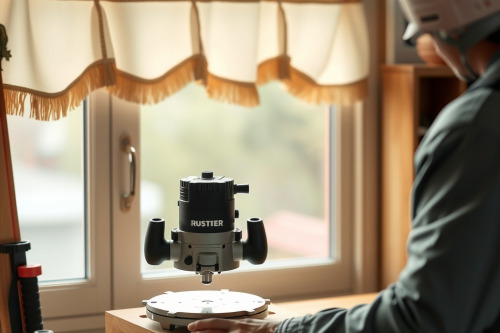
Poorly cut stock and sloppy edge profiles will ruin any finish carpentry job before it even leaves the bench. Over 25 years on trim sites, I have seen warped fascia boards destroy clean room lines because someone rushed their milling. Tackling building custom window valances requires rigid tool control and exact depth settings to keep joints dead square. Get your setup right from the first pass or pay for replacement hardwood later.
Choosing a wood router for building custom window valances
You can't produce clean profiles on long window trim using underpowered motors. A mid-sized 2.25 HP wood router delivers the sweet spot of control and raw torque for heavy hardwoods like white oak or hard maple. Look for soft-start electronics and variable speed dials. Dropping motor RPM from 22000 down to 14000 RPM prevents heat buildup when running 1/2-inch shank architectural bits. Lightweight laminate trimmers vibrate excessively when cutting a 19mm deep decorative wooden cornice, leading directly to edge wander.
A rigid base plate is mandatory. Cast aluminum bases withstand shop drops better than cheap composite housings. Look for tool designs featuring precision micro-adjusters. If the dial slips under load, you ruin a 2.4m board instantly. The best wood router for decorative trim work must accept template guide bushings without binding. Make sure the sub-base centers perfectly around your spindle before spinning up any cutter.
Dialing in profile depth and eliminating bit chatter
Never hog out material in a single aggressive pass. Setting your full profile depth on pass one stresses the motor and creates violent bit chatter along clear grain lines. Split a 12mm Roman ogee cut into 3 consecutive passes of 4mm each. Your first 2 passes rough out the bulk clearance, while your third pass acts purely as a 0.5mm cleanup skim. This technique stops grain tear-out on figured maple and eliminates visible tooling ripples.
Feed rate dictates surface quality. Pushing stock too slowly causes heat discoloration, effectively burning the stock across exposed end grains. Moving too quickly chatters the motor and tears out fibers at the corners. Listen to the pitch of the motor under load. Keep an even, steady push against bit rotation to maintain control. Always use sharp carbide cutters instead of dull high-speed steel alternatives.
Preventing collet slip and dust collection choke
Tool maintenance is finish carpentry insurance. Clean your 1/2-inch collet regularly with solvent to remove baked pitch and resin. Dirt buildup causes severe collet slip, allowing heavy bits to creep downward mid-cut and destroy the work piece. Seat bits at least 19mm deep inside the collet cone. Never bottom the shank out entirely; back it out 2mm to leave thermal expansion clearance before cinching the nut down with 2 wrenches.
Chip volume on long valance moldings is massive. A restricted vacuum hose results in instant dust collection choke, packing the bit chamber with dense sawdust. When waste packs tight inside the sub-base, cut visibility drops to zero, and bit temperatures spike past 200 degrees Celsius. Hook your router shroud directly to a 63mm dedicated extractor line to pull shavings off the cutting radius instantaneously.
Joinery and mounting valence box structures
Valance frameworks must resist moisture swings near living room window treatments. Mill rabbit joints along the top returns using a 19mm straight cutter to seat a 12mm plywood dust cap. Rabbet joinery resists sagging far better than butt joints secured only with brads. Reinforce internal corners with hardwood blocking glued and fastened with 38mm trim screws. This creates a rock-solid perimeter that keeps the face trim dead flat across spans exceeding 2m.
When mounting valence box assemblies to drywall, target structural wall studs every time. Drive 75mm cabinet screws through a continuous internal cleat secured into your framing. Fasteners must support the valence box, heavy drapery tracks, and incidental weight without flexing. Check level across the 3m room span using an accurate spirit level. Shimming the cleat dead plumb eliminates uneven gaps along ceiling lines.
Field wood router review: Plunge versus fixed bases
In this wood router review based on site testing, base selection directly determines edge accuracy. A fixed base gives you a low center of gravity. This makes it ideal for running roundover or cove bits along the bottom edges of mounted valances without wobbling. The low balance point keeps the sub-base dead flat on a 19mm narrow stock edge, preventing tilted cuts.
Plunge bases shine during stopped grooves or blind hardware mortises. Precision plunge springs allow smooth entry from above without kickback risks. However, plunge bases sit top-heavy, increasing the risk of tilting during continuous edge profiling. For building custom window valances, keep a dedicated fixed-base unit mounted on the edge guide, and reserve the plunge motor strictly for stops, slots, and housing joints.
Final checklist for building custom window valances
Inspect every milled board under raking work lights before final assembly. Sanding out deep gouges after nailing takes 3 times longer than fixing router passes on the bench. Check your bit bearings regularly for grit and wobble. Verify the fence alignment against a verified steel square to guarantee uniform cuts from end to end. Set up featherboards on wide boards to lock the stock firmly down against the router table bed.
Quality finish trim demands rigid setups, clean cuts, and absolute focus on tool maintenance. Don't skimp on test passes; run identical scrap hardwood to check the edge profile before cutting your final boards. Inspect your bits for resin buildup right now, adjust your stops accurately, and cut clean parts on the first pass.