
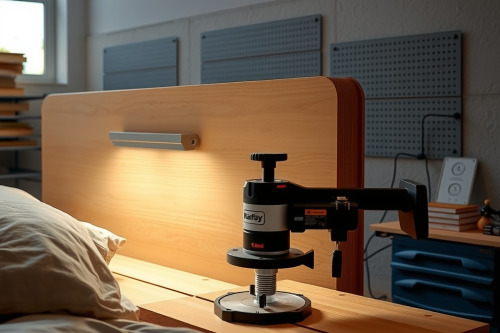
Hacking a wiring channel into solid hardwood with the wrong speed or cutter ruins expensive furniture lumber in 2 seconds flat. Over 15 years on custom job sites, I've watched greenhorns burn expensive walnut slabs by plunging dull cutters without a guide fence. Milling clean recesses for custom headboard LED lighting demands the right balance of motor power and disciplined feed control. Dialing in the proper wood router setup saves your stock and prevents sloppy electrical fitment.
Choosing gear for custom headboard LED lighting channels
Beginners often grab whatever machine sits on the sale rack. That is a mistake. When building an integrated headboard, you need a compact tool that offers zero base deflection and dependable depth stops. The best wood router for this specific job balances 1.25 HP to 2.25 HP in an easily handled frame. Heavy 3.25 HP beasts will exhaust your arms across a 2000mm headboard span, tilting the sub-base and gouging visible edges.
A practical wood router review should always scrutinize base plate flat tolerances and collet runout. If the spindle displays more than 0.03mm runout, your aluminum extrusion will fit poorly. Look for plunge bases equipped with brass micro-adjusters and smooth spring travel. Plunging smoothly matters because hesitations leave divots right at the start of your channel runs.
Motor specs and base configurations
Choose between 1/4-inch and 1/2-inch collet assemblies based on bit availability. While 1/2-inch shanks offer superior rigidity against deflection, compact trim units handling 1/4-inch bits offer agile hand control for perimeter runs. Always torque collet nuts using two wrenches rather than relying solely on a cheap shaft lock. Improper torque invites sudden collet slip, instantly driving the spinning bit straight through your decorative headboard face.
Tooling and setup for clean extrusion mortises
Skip cheap high-speed steel cutters for this joinery. Solid carbide spiral upcut bits clear wood chips efficiently from narrow slots. When you run standard straight two-flute bits, chips pack tightly inside the mortise. That friction causes excessive heat build-up, burning the stock within 100mm of travel. A 12mm upcut spiral evacuates waste upwards, keeping cutter flutes cool across long continuous runs.
Take exact physical measurements before touching lumber. Grab your caliper to measure the aluminum LED channel width and profile depth down to 0.1mm. Extrusion dimensions differ between suppliers by up to 0.8mm. Build your routing plan around real physical hardware rather than nominal online spec sheets.
Dialing in profile depth and fence alignment
Never plow out a full 12mm deep channel in 1 pass. Running aggressive single cuts generates violent bit chatter that ruins edge crispness and chips your fence guide line. Set your turret stop to clear waste across 3 stepped passes. Removing 4mm per pass preserves bit sharpness and keeps cutter drift under control.
Clamp a straight, rigid aluminum straightedge directly across your headboard workpiece. Secure it firmly with at least 2 heavy F-clamps. Don't rely entirely on plastic edge guides because they flex under sideways hand pressure.
Milling precision grooves for custom headboard LED lighting
Feed direction dictates your edge quality. Always push the base against bit rotation using conventional routing cuts. Feed from left to right along an external clamped fence. Feeding backwards produces dangerous climb cuts that violently pull the tool forward out of your grip.
Cross-grain cuts across hardwood stiles risk major tear-out where the bit exits the edge. Prevent this damage by clamping sacrificial scrap blocks flush against your stock perimeter. The cutter exits into scrap timber, leaving crisp, splinter-free corners on your finished furniture piece.
Managing concealed wiring channel mortise passes
Your aluminum LED channel routing must connect to driver electronics behind the headboard framework. Drop a plunge cut 15mm deep into the hidden back frame to establish a concealed wiring channel mortise. This channel houses low-voltage 24V supply leads without pinching copper conductors against drywall anchors.
Maintain an active shop vacuum hookup during operation. Fine hardwood dust easily packs narrow passes, creating a dust collection choke that obscures your layout line and scorches the bit. Clean chip evacuation guarantees unobstructed sightlines on your reference points.
Eliminating job site flaws and bit chatter
High motor RPM doesn't automatically produce clean joinery. Spinning a small bit at 24000 RPM while pushing forward too slowly cooks wood fibers, leaving dark burn marks across oak and cherry. Drop your motor speed dial to roughly 18000 RPM and maintain a constant, steady hand pace. If you smell burning wood, increase your feed speed immediately.
Bit chatter indicates machine vibration caused by loose template bushings, worn collets, or excessive bit extension. Chuck the bit shank deep into the collet, leaving only 3mm of clearance above the transition radius. Running bits extended too far creates runout that ruins flush mount lighting groove tolerances.
Assembly, wiring, and thermal management
Raw LED strip tape stuck directly to bare wood fails early due to heat accumulation. Wood insulates heat, driving diode junction temperatures past 70°C and degrading adhesive backing within months. Aluminum extrusions act as indispensable heat sinks that dissipate thermal energy safely.
A successful accent light headboard installation requires dry-fitting every aluminum rail before applying finish. Sand your routing ridges flat with 150-grit paper wrapped around an acrylic block. The aluminum channel must slide in under gentle thumb pressure without binding or rocking.
Precision standards for custom headboard LED lighting
Milling flawless custom headboard LED lighting channels requires zero guesswork. Inspect collet tightness, use rigid clamping fences, and take multiple shallow passes to protect hardwood stock from tear-out. Measure your aluminum profiles directly, keep feed speeds smooth, and never force a dull bit through dense grain. Clamp your guide rails securely, check your cutter depth now, and mill your headboard grooves with total confidence.