
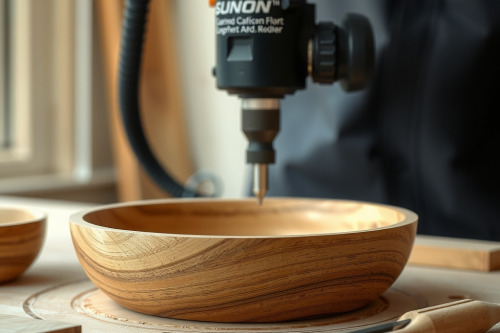
Routing deep hollows into dense hardwood blanks can ruin a project in seconds if your feed rates and setup are sloppy. After 25 years running custom architectural millwork and turning out bespoke serving vessels, I've seen green apprentices smoke tooling and wreck stock simply by pushing beyond proper depth limits. Dialing in precise carving profiles for wooden bowls requires mechanical discipline and deliberate router setup. Treat your setup with respect, match your RPM to the cutter diameter, and you'll produce crisp transitions every time.

Choosing the best wood router platform for hollow work
New hands often grab the first trim tool on the bench, but hogging material out of a thick maple slab demands muscle and rigid bases. When selecting the best wood router for heavy mortising and deep dish profiles, a variable-speed plunge base rated at 2.25 horsepower is the absolute baseline. Fixed bases offer zero plunge control on enclosed vessel floors, leading directly to bit plunge gouges and surface scarring. Inspect motor bearings for radial runout before chucking a cutter, because any shaft play magnifies vibration across a 30mm dish bit.
A solid wood router review reveals that cheap motor housings flex under side loading during radial sweeps. Look for precision-machined brass bushings, micro-fine depth stops, and heavy cast bases that damp motor harmonics. If your plunge action binds halfway down, stop work immediately and clean out packed sawdust.
Setting up carving profiles for wooden bowls safely
Executing accurate carving profiles for wooden bowls starts with template design and secure workpiece fixturing. Never hand-hold a blank while running a dish-carving or bowl-and-tray bit with top-mounted bearings. Build a dedicated routing tray with toggle clamps, securing your workpiece to the bench without screws penetrating the display surface. Calculate your target profile depth before taking your initial cut, splitting the full excavation into multiple passes of 3mm or 4mm.
Trying to remove 18mm of material in a single pass invites severe collet slip and dangerous tool deflection. Seat the cutter shank deeply into the collet, back it out 2mm to avoid bottoming against the shaft taper, and torque the nut with matched service wrenches.
Tooling selection and handling bit chatter
Standard straight flutes leave stepped ridges along curved vessel walls, requiring hours of brutal hand scraping. Dedicated bowl-and-tray bits feature radiused corners that blend the bottom flat smoothly into a gentle 6mm or 12mm cove. High-grade carbide cutting edges stay sharp longer in abrasive exotics like walnut and wenge. Cheap imported cutters dull quickly, raising cutting resistance and causing intense bit chatter that chatters through delicate side walls.
Listen to the motor pitch when the cutter engages end grain. If the motor screams with high-frequency pitch and your cuts display washboard ripples, drop your rotation speed down to 14000 RPM. Match the cutter mass to spindle speed to eliminate chatter patterns across finished tray bottoms.
Managing feed rates to avoid burning the stock
Pushing a cutter through cherry or hard maple requires steady manual pressure and an intuitive feel for feed resistance. Pausing for even a fraction of a second inside an enclosed profile causes excessive friction, instantly burning the stock and ruining the timber grain. Keep the router moving clockwise around your internal template walls at a steady rate of 40mm to 60mm per second. This maintains chip load and pulls heat out through chips rather than transferring thermal stress into the vessel walls.
Watch out for grain direction shifts when traversing corners. Routing against unsupported fibers produces ragged tear-out along the rim, which ruins thin profiles. Take a feather-light finishing climb cut of 0.5mm along the final perimeter pass, holding the tool base down with firm downward force.
Template guides and preventing dust collection choke
Guide bushings and pattern bearings dictate the final line of your serving trays. Clean resin and packed pitch off guide bearings with solvent before dropping the tool into the template. When hogging out deep interior volumes, chips pile up fast inside the cavity. This buildup causes a total dust collection choke, packing chips around the spinning bit shank and overheating the tool.
Run a dedicated 63mm vacuum hose straight to the base dust shroud with continuous suction. If the port packs tight, pull the plunge base completely clear of the cut, let the motor spin down, and vacuum out the pocket manually before resuming feed passes.
Practical steps for cutting carving profiles for wooden bowls
Quality results come from strict methodical habits, not hurried production. Before you plunge your wood router into raw lumber, lay out your templates, verify clamp clearances, and run a test pass in scrap stock. Check your finished profile depth with a digital depth gauge to ensure absolute symmetry across your tray bases. Inspect your collet cone monthly for internal scoring or brassing, replacing worn parts immediately to maintain concentricity. Build a dedicated template jig today, set your plunge stops cleanly, and cut your first hardwood tray with total control.