
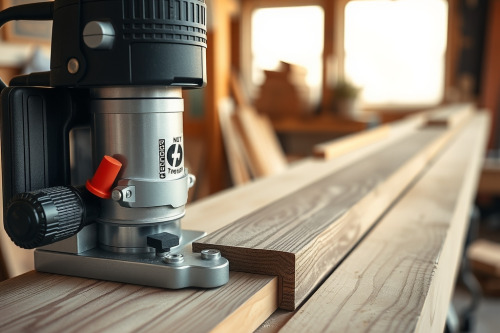
Off-the-shelf transition strips crack under heavy foot traffic and rarely match uneven floor elevations on a real jobsite. After 25 years of trimming out high-end residential interiors, I refuse to gamble with cheap pre-molded trim. Milling your own custom wooden thresholds guarantees a dead-flat match between disparate surfaces like 19mm hardwood and flush-set tile. Getting crisp, bulletproof transitions requires precise stock prep and the muscle of a dependable wood router.
Stock selection and prep for custom wooden thresholds
Flat thresholds demand bone-dry, dead-straight timber. Never grab construction-grade lumber off the rack and expect stable flooring transition strips. Select kiln-dried 4/4 or 5/4 quarter-sawn white oak, hard maple, or walnut with a moisture content between 6% and 8%. Flat-sawn lumber twists when humidity swings, blowing out your margins at the door casing.
Dress every blank square on the jointer and planer first. Allow the dressed stock to acclimate inside the installation room for at least 72 hours. Check your blank thickness with calipers across multiple points. A variance of 0.5mm will cause an unsightly lip where the wood meets finished floor tile.
Choosing the best wood router for shaping hardwood profiles
Horsepower dictates cut quality when shaping dense lumber. Any serious wood router review focuses on torque retention under sustained load. Light trim units stall out when hogging out an offset floor reducer in seasoned white oak. You need a mid-sized plunge or fixed base unit rated at 2.25hp minimum.
Solid electronic speed control is mandatory. Spinning large-diameter profile bits at 24000 RPM guarantees burning the stock into charcoal. You must throttle back to 16000 or 18000 RPM. A robust 12mm collet provides important clamping surface area. Running large bullnose or rabbeting bits on a 6mm shank invites disaster, as collet slip under heavy side loads ruins expensive blanks instantly. For dedicated milling tasks, the best wood router balances vibration dampening with brute torque.
Dialing in profile depth and router table setup
Freehand routing on narrow blanks is a fool's errand. Always mount your wood router inside a rigid table fitted with a dead-flat fence. Lock the fence parallel to the miter slot. Secure a dual-position featherboard against the blank to keep downwards and sideways pressure consistent against the cutter.
Staged stock removal
Never take the full cut in a single pass. Hogging off 12mm of stock in one go overloads the motor and wrecks your edge. Set your profile depth in 3mm increments. Three moderate passes yield a glassy surface, whereas one aggressive cut produces rough scallop marks.
Handling exhaust and debris
Hook up a high-volume dust extractor right at the cutter guard. Milling wide hardwood transitions generates mountains of dense chips in seconds. A dust collection choke fills the router housing fast, overheating the motor windings and obscuring your view of the cut line.
Eliminating tear-out and bit chatter on long grain passes
End-grain and figured hardwoods fight router cutters viciously. bit chatter creates washboard ripples across the bevel that take hours of hand scraping to remove. Feed the blank smoothly against the bit rotation at a steady pace. Hesitate for one second, and friction heat leaves black scorch marks that penetrate deep into open grain pores.
Back up the trailing end with a sacrificial push block. This prevents severe tear-out as the bit exits the final 25mm of the cut. When rabbeting hardwood thresholds for an offset transition, feed the workpiece from right to left across the table. Maintain constant feed speed. Consistent feed pressure keeps the cutter engaged cleanly in the sweet spot of its shear angle.
Undercutting and fitting custom wooden thresholds on site
Floors are never level, and slabs are rarely flat. Measure the height differential between your two floor coverings at both jambs and the center point. Scribe the underside contour of your custom wooden thresholds to compensate for subfloor humps. Mill a relief groove 2mm deep along the underside belly of the threshold.
This hollow ground relief prevents the threshold from rocking over high spots in concrete subfloors. Dry fit the threshold between the door jambs without fasteners first. Step directly onto the center line. If you feel any deflection or hear floor squeaks, pull the threshold back out and tune the underside rabbet with a shoulder plane.
Field inspection standards for custom wooden thresholds
Inspect every edge under raking light before laying down adhesive or driving finish screws. Run your fingertips across the transition seam. The threshold must sit flush or project no more than 1mm above adjoining hard surfaces to eliminate trip hazards. Look down the length of the profile to verify zero bit deflection along the bevel line.
Clean out the installation channel thoroughly before final seating. Lay two continuous beads of polyurethane construction adhesive along the subfloor contact points. Drop your custom wooden thresholds into place, weight them down with 20kg sandbags, and let the adhesive cure fully for 24 hours. Measure twice, build rigid shop jigs, and take controlled passes to build rock-solid thresholds that outlast the structure.