
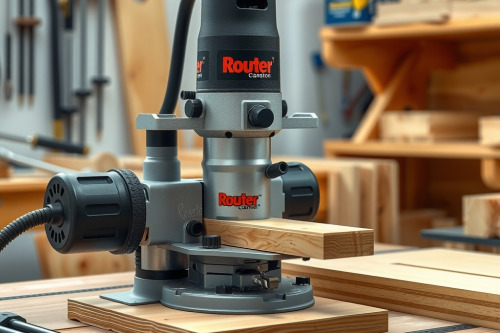
Running a cutter at maximum revs on dense white oak will ruin your tooling before lunch. After 25 years dressing architectural trim, I see beginners destroy workpieces daily because they misjudge their router speed settings for timber densities. Matching motor velocity to wood hardness prevents catastrophic tool failure and maintains edge integrity across long runs.
Fundamental physics of router speed settings for timber densities
Wood isn't a uniform block of plastic. Every species possesses a specific Janka hardness rating and cellular structure that dictates how a spinning flute shears wood fibers. Dense timbers like hard maple, hickory, or ipe demand lower cutter revolutions to prevent friction build-up. Pushing 24000 RPM into sugar maple creates brutal heat immediately. That friction cooks the resin, leading to dull edges and ruined workpieces.
Conversely, softer species like western red cedar or sugar pine require higher spindle speeds. If your motor spins too slowly on soft fiber, the knives tear chunks instead of shaving clean curls. You need clean shearing action. Balancing surface feet per minute requires a solid variable speed wood router capable of maintaining electronic feedback under load. When RPM drops under friction, your cuts suffer instantly.
Softwoods versus hardwoods: dialing RPM to cutter diameter
Timber density represents half the equation; cutter diameter dictates the rest. As bit width expands, rim velocity climbs drastically. A 50mm raised panel bit spinning at 22000 RPM will exceed safe peripheral speed limits, risking carbide failure on the bench. You must throttle the motor down as cutter mass grows.
Recommended RPM parameters
- Small cutters (under 25mm): Run between 18000 RPM and 22000 RPM in softwoods; drop to 16000 RPM in dense hardwoods.
- Medium cutters (25mm to 50mm): Set dial between 13000 RPM and 18000 RPM depending on species resistance.
- Large cutters (over 50mm): Cap speed between 8000 RPM and 12000 RPM strictly to preserve tool stability.
Always verify rotational velocity using an optical tachometer if your tool lacks digital readouts. Dependable speed dials make any wood router review worth reading before purchasing shop gear.
Preventing bit chatter and tear-out across grain transitions
Vibration kills finish quality faster than dull carbide. When cutting against wild grain or hard figure, bit chatter leaves washboard ridges across your molding profiles. This happens when the cutter deflects under excessive timber resistance. Lowering your speed setting by 2000 RPM dampens harmonics and stabilizes the shaft inside the cut.
You must also manage profile depth systematically. Never hog out a 12mm deep profile in a single pass through ash or walnut. Take preliminary hogging passes at 3mm or 4mm depths, saving a final 0.5mm skim pass for cleanup. That stepped sequence stops catastrophic tear-out dead in its tracks, particularly when exiting end grain runs.
Field diagnostics: spotting burning the stock and motor strain
Your senses tell you everything about cutting performance. A sharp, burning smell combined with black glaze across cherry or cherry end grain means your spindle velocity is too high for your feed velocity. You're burning the stock because the cutter rubs rather than bites. Increase feed rate or pull motor speed down by 1 to 2 dial notches.
Listen to motor pitch under load. A healthy electric motor maintains a steady, rhythmic pitch through the pass. High-pitched screaming indicates excessive surface velocity, whereas a sudden drop in pitch signals motor bogging and impending stall. The best wood router maintains consistent torque through electronic speed management modules, compensating instantly as timber density spikes across knots.
Best practices for router speed settings for timber densities on site
Jobsite conditions demand rigid operational discipline. Keep an organized setup by following these standard steps before plugging in:
- Assess timber moisture content; wet stock (above 14%) grabs cutters aggressively and requires reduced RPM.
- Match bit geometry to timber hardness, reserving down-spiral solid carbide tooling for splinter-prone hardwoods.
- Run test cuts on sacrificial scrap from the identical board lot to dial in feed resistance before cutting finish stock.
- Lock the depth adjustment clamp tightly to resist creeping vibration under heavy side-loads.
A dependable wood router must adapt seamlessly between rough dimensioning and delicate joinery. Rushing spindle setups guarantees wasted stock and damaged profiles.
Shop maintenance: avoiding collet slip and dust collection choke
Mechanics matter as much as speed charts. Inspect your chuck assembly weekly. Resin glaze or sawdust contamination inside the collet cone reduces clamping surface, triggering sudden collet slip during deep cuts. When a bit shifts downward mid-cut, your profile depth is compromised and your bit faces extreme runout forces. Clean collets with solvent and brass brushes regularly.
Manage your chip extraction aggressively. Dense chip buildup causes dust collection choke inside router plunge bases and under-table enclosures. Trapped shavings force the bit to re-cut chips, driving cutting temperatures past 300 degrees Celsius within seconds. Evacuate waste continuously to make sure cutter longevity.
Action plan for the jobsite bench
Do not treat router speed settings for timber densities as guesswork. Check your species density, calculate cutter diameter limits, and dial back motor speed on dense hardwoods. Inspect your shank engagement, lock your fences, and run clean, confident passes on your next job.