
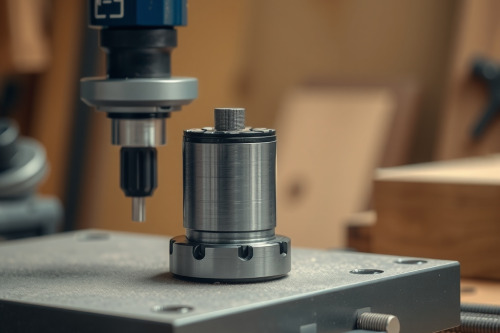
You pull a clean piece of black walnut off the bench only to find washboard ripples and chipped grain along the edge. After 20 years running shaping profiles on job sites, I know that sudden chattering and excessive vibration means your setup is fighting physics. Ignoring this violent shudder ruins your workpiece, damages spindle bearings, and turns a basic trim pass into a dangerous kickback hazard. Diagnosing the root mechanical fault immediately restores surface finish and protects your gear.

Mechanical Causes of Chattering and Excessive Vibration
Shank Seating and Collet Wear
Examine the collet first. Dirt, resin, and metal fatigue inside the cone destroy clamping force. If you bottom out a bit in the collet bore, thermal expansion pushes the bit off-center as heat builds. Leave a 3mm gap at the bottom of the socket to make sure concentric pressure. Inadequate router shank grip depth leads directly to collet slip under heavy side loads. When collet slip occurs, the cutter climbs outward, amplifying bit chatter and scarring the wood surface. Replace worn split collets every 200 hours of heavy milling.
Spindle Runout and Bearing Tolerances
A bent spindle ruins cuts. Even the best wood router turns into a lumber shredder if shaft runout exceeds 0.03mm. Measure spindle deviation using a precision dial indicator mounted against the inner taper. High radial play reveals failed sealed ball bearings. When bearings chatter inside the housing, vibration travels down the cutter shaft and translates directly into ripples on your work. Any reputable wood router review will prioritize low spindle deflection, but rough handling on the job site destroys bearings fast.
Feed Rate Dynamics and Cutting Geometry
Climb Cutting Versus Conventional Passes
Feed rate dictates chip load. Push the tool too slowly, and friction spikes, instantly burning the stock. Push too fast, and the cutter bites off more wood than the gullet can clear. This stall causes violent cutter deflection. Novice operators often try climb cutting on hand-held passes to avoid tear-out on difficult grain. Don't do this. Hand-held climb milling pulls the tool forward out of your grip, introducing severe chattering and excessive vibration while creating massive kickback danger. Reserve climb milling exclusively for light finish passes on rigid router tables.
Profile Depth and Step-Down Cuts
Hogging out a full 12mm profile in one pass invites immediate disaster. Excessive cutter engagement overwhelms the motor torque and flexes the bit shank. Divide your target profile depth into 2 or 3 shallower step-down passes. Take a roughing pass to hog off bulk waste, then skim the remaining 1mm for clean finish dimensions. Proper router feed rate adjustment combined with shallow passes eliminates tool strain and saves expensive hardwood stock from splitting.
Tooling Balance and Bit Diameter Guidelines
Large Diameter Cutters and Rotational RPM
Large panel-raising bits carry important mass. Spinning an 80mm cutter at 24000 RPM turns small router bit balance issues into destructive shockwaves. Match your tool rotation to the cutter diameter using proper variable speed router settings. Run 25mm straight bits at 20000 RPM, but drop large raised-panel profiles down to 12000 RPM. Always favor bits with 1/2 inch shanks over 1/4 inch shanks whenever available. A 1/2 inch shank provides 4 times the rigidity of a 1/4 inch shaft, cutting deflection down to near zero.
Dust Extraction and Workpiece Fixturing
Preventing Dust Collection Choke and Clamping Deflection
Rigid stock clamping is non-negotiable. If your stock flexes across the workbench, the cutter bounces instead of slicing. Fasten hold-downs directly behind the cut line. Simultaneously, monitor your vac system for a dust collection choke. When chips pack the extraction shroud, trapped debris regrinds against the spinning flutes. This re-cutting action destabilizes the wood router, elevates thermal stress, and increases vibration across the entire machine body. Keep chip ports unobstructed with high-flow suction.
Systematic Checklist to Stop Chattering and Excessive Vibration
Inspect your setup using a disciplined sequence before ripping another expensive board:
- Step 1: Unplug the motor and inspect the bit for chipped carbide edges or burnt pitch buildup. Clean cutting flutes with brass wire and citrus solvent.
- Step 2: Check collet mating surfaces. Wipe away fine sawdust, check the split grooves, and verify proper bit insertion depth.
- Step 3: Dial back motor RPM based on cutter diameter to prevent resonant harmonic wobble.
- Step 4: Secure the workpiece firmly with mechanical toggle clamps to remove all material flex.
- Step 5: Test cut on scrap lumber of matching density to calibrate your hand feed rhythm.
Field Deployment and Rigidity Verification
Vibration is an operational warning sign, never a baseline condition. Whenever you encounter chattering and excessive vibration during operation, shut off power and walk the machine through each mechanical checkpoint. Check bit sharpness, collet tension, bearing play, and feed consistency before you touch finish lumber. Implement these inspection protocols on your bench right now to produce razor-sharp edges on every pass.